
Delicious Baked Asparagus with Parmesan Cheese in 20 Minutes
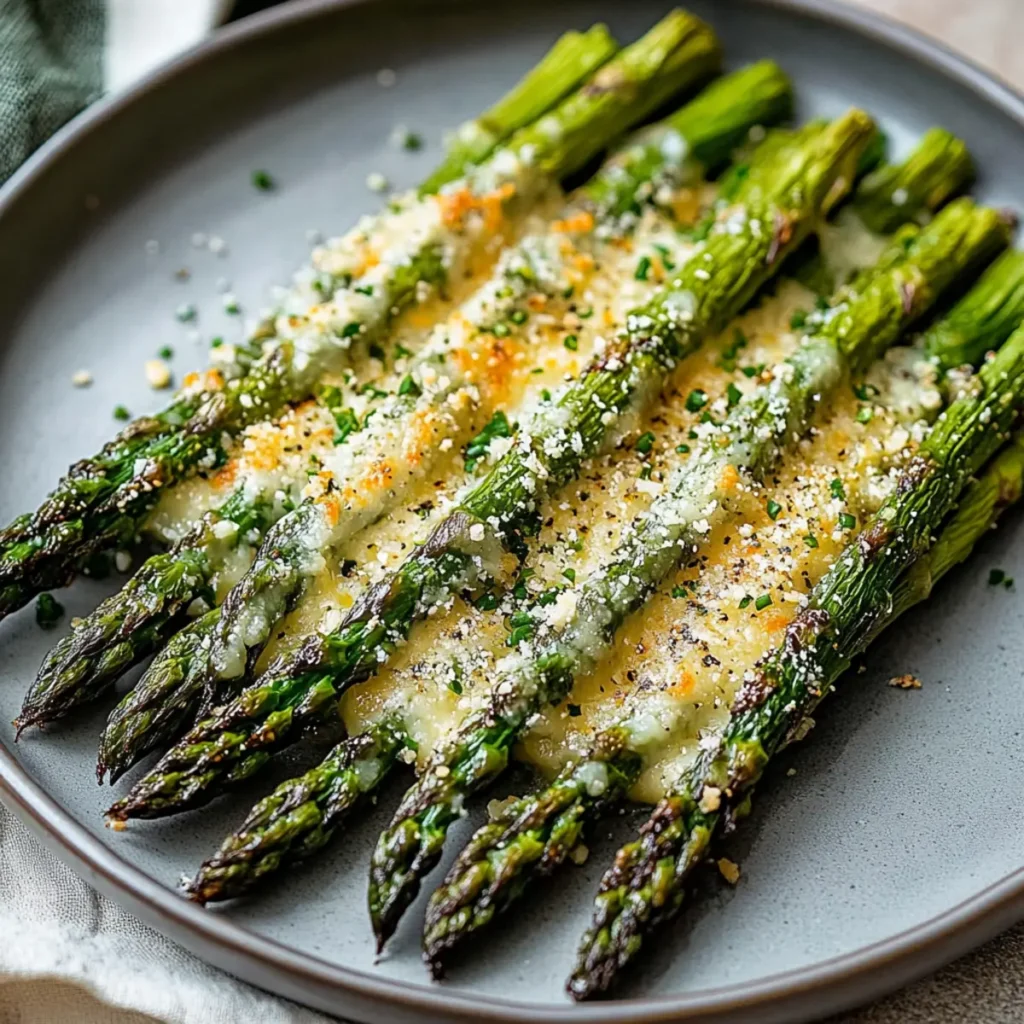
In the realm of quick, delightful side dishes, nothing quite matches the magic of Baked Asparagus with Parmesan Cheese. Picture this: perfectly roasted asparagus spears, bathed in olive oil, creating a warm, inviting aroma that dances through your kitchen just like a spell. The moment you take that first bite, the crunchy texture blends flawlessly with the rich, cheesy goodness of Parmesan cheese, igniting your taste buds like a grand, flavorful celebration. What makes Baked Asparagus with Parmesan Cheese truly special is its versatility and ease. Whether it graces your dinner table for a casual family meal or adds a touch of elegance to a festive gathering, this dish never fails to impress. It’s simple, yet it brings a sophisticated flair that makes you feel like a culinary rock star. Let’s dive into this delightful recipe that’s as easy to whip up as it is delicious! Ingredients for Baked Asparagus with Parmesan Cheese Here’s what you’ll need to make this delicious Baked Asparagus with Parmesan Cheese: 1 bunch Asparagus spears: Look for bright green spears with firm, tightly closed tips. Thin stalks will be more tender, while thicker stalks have a heartier taste. 2 tablespoons Olive oil: Extra virgin olive oil adds a fruity note that enhances the asparagus flavor while helping to achieve that golden roast. 1 teaspoon Salt: A crucial seasoning to amplify the natural flavors of the asparagus, creating a savory base for the dish. 1 teaspoon Black pepper: Freshly ground pepper adds a nice warmth and complexity to the dish, balancing the richness of the cheese. 1 cup Parmesan cheese: Grated or shredded, Parmesan provides a nutty flavor and crispy topping that perfectly complements the tender asparagus. 1 teaspoon Garlic powder: A sprinkle of garlic powder infuses the dish with aromatic depth and an irresistible savory kick. 1 teaspoon Lemon zest: This bright addition offers a refreshing twist, elevating the overall taste with its zesty brightness. How to Make Baked Asparagus with Parmesan Cheese Follow these simple steps to prepare this delicious Baked Asparagus with Parmesan Cheese: Step 1: Preheat Your Oven Preheat your oven to 425°F (220°C). This high temperature is key to achieving that perfect balance of tenderness and crispiness in your asparagus. Step 2: Prepare the Asparagus Wash and trim the asparagus by cutting off the woody ends, usually about an inch or so. Place the lovely green spears on a baking sheet, arranging them in a single layer for even roasting. Step 3: Season the Asparagus Drizzle the asparagus with olive oil and sprinkle with salt, black pepper, garlic powder, and lemon zest. Toss the spears gently with your hands or a spatula, ensuring each spear is well coated for maximum flavor. Step 4: Add the Parmesan Top the seasoned asparagus evenly with freshly grated Parmesan cheese. Make sure to distribute it generously for that glorious cheesy crust as it bakes. Step 5: Bake to Perfection Slide the baking sheet into the preheated oven and bake for about 15 minutes. The asparagus should be tender, and the cheese should be golden brown and bubbling, making for an enticing aroma that fills your kitchen. Step 6: Serve and Enjoy! Once it’s done, remove the baking sheet from the oven and let it cool for a minute. Transfer the Baked Asparagus with Parmesan Cheese to a serving platter, and get ready for some serious compliments from family and friends. Serve it alongside your favorite main dishes or enjoy it as a stand-alone snack—either way, this dish is sure to steal the spotlight. Now, as we bring our culinary adventure to a close, remember this: the joy of cooking is not just about the food on the plate but the laughter and memories made in the kitchen. So gather your loved ones, whip up this delicious Baked Asparagus with Parmesan Cheese, and create a flavorful masterpiece that’s bound to become a cherished addition to your dining repertoire. Each bite is a reminder of the beauty of good food and even better company—the perfect recipe for a happy heart! Perfecting Baked Asparagus with Parmesan Cheese Cooking Process Start by preheating your oven to 425°F (220°C). As you prep the asparagus, you can also grate the Parmesan and mix your seasonings. This multitasking will streamline your process and maximize flavor infusion. Add Your Touch to Baked Asparagus with Parmesan Cheese Feel free to mix things up by adding different cheeses like cheddar or gouda. You could also swap the lemon zest for lime or try sprinkling in some crushed red pepper for a spicy kick. Personalize the experience! Storing & Reheating Baked Asparagus with Parmesan Cheese To store leftovers, place the asparagus in an airtight container in the refrigerator for up to three days. Reheat it in the oven at 350°F (175°C) for about 10 minutes to retain its crunch without sacrificing flavor. Sometimes, my friends ask me for the secret behind my famous Baked Asparagus with Parmesan Cheese. I smile, share a laugh, and tell them it’s all about the love you sprinkle in, just like the cheese! FAQs About Baked Asparagus with Parmesan Cheese What is Baked Asparagus with Parmesan Cheese? Baked Asparagus with Parmesan Cheese is a delightful side dish that features fresh asparagus spears drizzled with olive oil, seasoned with garlic and lemon zest, and generously topped with parmesan cheese. The asparagus is baked until tender and the cheese becomes crispy and golden, creating a delightful contrast of textures. This recipe is quick and easy, making it perfect for weeknight dinners or special occasions. How do you know when Baked Asparagus with Parmesan Cheese is done? You’ll know your Baked Asparagus with Parmesan Cheese is done when the asparagus is tender yet still slightly crisp, and the parmesan cheese is bubbly and golden brown. Usually, about 15 minutes at 425°F (220°C) achieves this perfect result. If you’re unsure, you can always poke a spear with a fork to check its tenderness. Can I customize the flavors in Baked Asparagus with Parmesan Cheese?
Delicious Crispy Parmesan Artichoke Hearts Recipe for Appetizers

Imagine for a moment a crunchy, golden-brown artichoke heart, perfectly coated with a tempting mixture of Parmesan and Panko breadcrumbs. The enticing aroma wafts through your kitchen as you pop these delightful bites into the oven, promising a culinary adventure that is both simple and delightful. It’s no secret that these Crispy Parmesan Artichoke Hearts are a game changer, transforming a humble can of artichoke hearts into a show-stopping appetizer that will impress both guests and family alike. As a kid, I remember my aunt lovingly preparing snacks that made my taste buds dance with joy, but nothing could quite compare to the crispy delights she served. Each bite was a harmonious blend of crunch and flavor, and now, with the addition of this recipe to my collection, I find myself transported back to those sunny afternoons. These Crispy Parmesan Artichoke Hearts are perfect for gatherings or a cozy night in with a side of marinara sauce for dipping—it’s the little things in life that make the biggest impact! Ingredients for Crispy Parmesan Artichoke Hearts Here’s what you’ll need to make this delicious Crispy Parmesan Artichoke Hearts: 1 can or bag Artichoke hearts – Look for artichoke hearts packed in water or oil; this makes them tender and easy to work with. 2 tablespoons Olive oil – Extra virgin olive oil adds a rich flavor that complements the dish beautifully. 1 teaspoon Garlic powder – This adds a wonderful depth and aroma to the artichokes. 1 cup Panko breadcrumbs – These Japanese-style breadcrumbs create the ultimate crispy texture. 1/2 cup Parmesan cheese – Freshly grated Parmesan delivers the best flavor, but pre-grated will work in a pinch. 1 teaspoon Italian seasoning – A blend of herbs that brings an Italian flair to the dish. Salt and pepper to taste – Essential for balancing the flavors. 2 pieces Lemon wedges – Brightens up the dish and adds a zesty touch. 1 cup Marinara sauce – Perfect for dipping and enhancing flavor! How to Make Crispy Parmesan Artichoke Hearts Follow these simple steps to prepare this delicious Crispy Parmesan Artichoke Hearts: Step 1: Preheat the Oven Preheat your oven to 400°F (200°C) to ensure your artichoke hearts achieve the perfect crispy texture. Step 2: Prepare the Artichokes Drain the artichoke hearts and pat them dry with a paper towel, eliminating any excess moisture that could hinder the crispiness. Step 3: Season the Artichokes In a mixing bowl, toss the artichoke hearts with olive oil, garlic powder, salt, and pepper, ensuring they are evenly coated. Step 4: Create the Coating In another bowl, combine the Panko breadcrumbs, Italian seasoning, and Parmesan cheese, mixing well to create a flavorful coating. Step 5: Dredge the Artichokes Dip each seasoned artichoke heart into the breadcrumb mixture, pressing lightly to ensure they are fully coated. This is where the magic happens! Step 6: Bake to Perfection Arrange the coated artichoke hearts on a baking sheet and place them in the oven. Bake for about 25 minutes or until they are golden brown and crispy. Once they’ve cooled down just a tad, serve these scrumptious Crispy Parmesan Artichoke Hearts with lemon wedges and a side of marinara sauce. Each bite is a delightful crunch accompanied by a burst of flavor that you will find hard to resist! Now that you have the recipe and the steps, why not gather the ingredients and get started? You will be amazed at how easy it is to whip up an appetizer that’s sure to please everyone at your table. Whether you’re serving these for a festive gathering or just treating yourself to a little snack, these Crispy Parmesan Artichoke Hearts are bound to leave a lasting impression. Enjoy every crunchy bite! This showstopping Crispy Parmesan Artichoke Hearts delivers restaurant-quality results using simple ingredients you probably already have at home. The perfect balance of textures and flavors creates an unforgettable dining experience that will have everyone asking for seconds. Picture-perfect presentation with vibrant colors makes this dish absolutely Instagram-worthy and guaranteed to impress any dinner guest. Incredibly versatile recipe that works beautifully for weeknight dinners, meal prep, special occasions, or even outdoor entertaining sessions. Perfecting Crispy Parmesan Artichoke Hearts Cooking Process To make your Crispy Parmesan Artichoke Hearts, start by preheating the oven for that golden crispiness. After prepping your artichoke hearts, mix your dry coating while the oven warms up. This ensures everything is ready for a seamless cooking experience. Add Your Touch to Crispy Parmesan Artichoke Hearts Feel free to customize your Crispy Parmesan Artichoke Hearts by swapping in fresh herbs or adding spices like smoked paprika for an extra kick. You could also try a different cheese like cheddar for a unique twist. Storing & Reheating Crispy Parmesan Artichoke Hearts To store your Crispy Parmesan Artichoke Hearts, place them in an airtight container in the refrigerator for up to three days. For reheating, use an oven to retain their crispy texture instead of a microwave. I remember the first time I made these delicious crispy artichoke hearts for a gathering. Everyone was raving about them, and honestly, it felt great knowing I could impress my friends with such an easy dish. FAQs About Crispy Parmesan Artichoke Hearts What is Crispy Parmesan Artichoke Hearts? Crispy Parmesan Artichoke Hearts are a delicious appetizer made from canned or jarred artichoke hearts, seasoned and coated with a tantalizing mixture of panko breadcrumbs and Parmesan cheese. This dish gets baked until golden brown, giving it a wonderfully crispy texture that contrasts beautifully with the tender heart of the artichoke. Serve it with marinara sauce for dipping or alongside a fresh salad for a delightful meal. Perfectly suited for gatherings or a cozy night in, these artichoke hearts are bound to impress. How do I make Crispy Parmesan Artichoke Hearts? To make Crispy Parmesan Artichoke Hearts, preheat your oven, and drain the artichoke hearts. Toss them in olive oil, garlic powder, salt, and pepper to ensure they’re flavorful. Then, coat each heart in a
Simple Smoked Salmon Cream Cheese Dip Recipe for Any Occasion
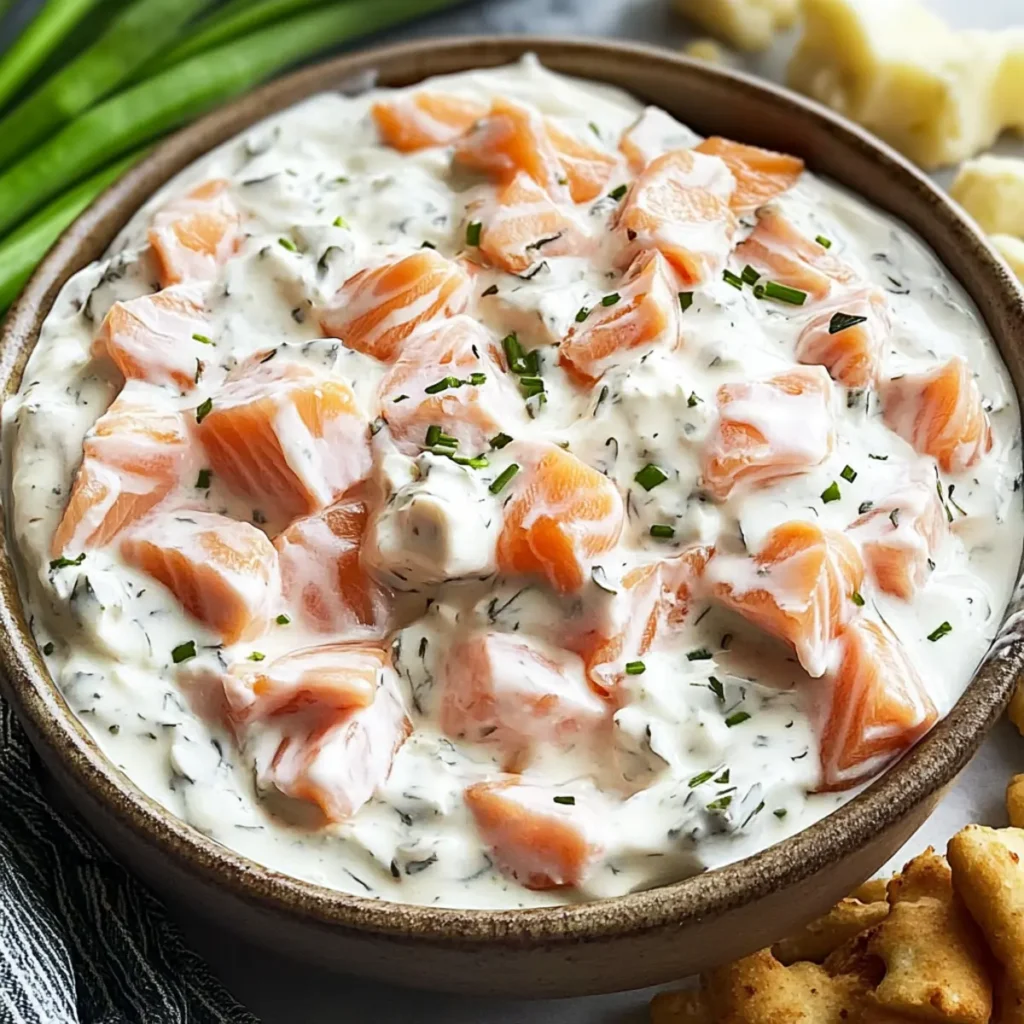
The aroma of Smoked Salmon Cream Cheese Dip wafts through the air, mixing the savory depth of smoked salmon with the creamy richness of cream cheese. Imagine a velvety dip that dances on your taste buds, delivering a zesty punch from the fresh dill and a delightful brininess from the capers. This dip isn’t just a snack; it’s a culinary experience that feels fancy yet comes together with minimal effort. Perfect for parties, picnics, or simply a homey evening with friends, this delightful dish will leave your guests clamoring for the recipe. As you dip your favorite crackers into this luscious concoction, memories of friendly gatherings and laughter emerge. Perhaps it’s a cozy evening with loved ones, sharing stories over bowls of deliciousness, or an elegant soirée where this dip takes center stage. Whichever occasion you choose, the anticipation builds as you prepare to indulge in a delicious blend of flavors that truly comfort the soul. Get ready for a flavor explosion that will make you the star of your next get-together. Ingredients for Smoked Salmon Cream Cheese Dip Here’s what you’ll need to make this delicious Smoked Salmon Cream Cheese Dip: 8 oz Cream cheese – Softened to room temperature for easy mixing, this forms the creamy base of your dip. 4 oz Smoked salmon – Finely chopped to ensure even distribution of its rich, smoky flavor throughout the dip. 1/2 cup Sour cream – Adds a tangy contrast that enhances the creaminess and complements the salmon perfectly. 2 tbsp Fresh dill (or chives) – Use fresh herbs for vibrant flavor; both options add a unique freshness to the dip. 1 tbsp Lemon juice – Fresh lemon juice brightens the flavors and balances the richness, lending a refreshing zing. 1 tbsp Capers – Rinsed and chopped, these little guys bring an irresistible briny kick that plays beautifully with the creaminess. 1 tsp Garlic powder – For a hint of savory depth without being overpowering, garlic powder blends perfectly. 1 pkg Crackers or bread – Your choice of vehicle for this dip; opt for something crispy to complement the creamy texture. 2 cups Vegetable sticks – Such as cucumbers or bell peppers, these add a fresh crunch and vibrant color to your platter. How to Make Smoked Salmon Cream Cheese Dip Follow these simple steps to prepare this delicious Smoked Salmon Cream Cheese Dip: Step 1: Prepare the Mixing Bowl Grab a medium-sized mixing bowl and add the softened cream cheese and sour cream. Use a hand mixer or spatula to blend until you achieve a silky smooth texture. Step 2: Add the Salmon Fold in the finely chopped smoked salmon gently. This helps maintain a delightful texture while ensuring that every scoop has that rich salmon flavor. Step 3: Incorporate the Flavorful Herbs Mix in the fresh dill (or chives), lemon juice, and chopped capers. Stir well until all the ingredients are evenly distributed in the creamy mixture. You might find yourself sneaking a taste—because who can resist? Step 4: Season It Up Sprinkle in the garlic powder and give another mix. Taste your dip and adjust as desired; perhaps a little more lemon juice for brightness or extra capers if you crave more zesty bites. Step 5: Chill for Maximum Flavor Transfer the dip into a serving bowl and refrigerate it for at least 30 minutes. This allows the flavors to meld beautifully, resulting in an enhanced taste experience that will make your taste buds dance. Step 6: Serve and Enjoy Serve your Smoked Salmon Cream Cheese Dip with a colorful array of crackers or crunchy vegetable sticks. Watch as it disappears before your very eyes, and prepare for the compliments to come rolling in! Whether it’s a cozy night with friends or a lively gathering, this dip will not only satisfy your cravings but also elevate your snack game to new heights. Gather your ingredients, roll up your sleeves, and get ready to indulge in this scrumptious Smoked Salmon Cream Cheese Dip! Perfecting Smoked Salmon Cream Cheese Dip Cooking Process Start by softening the cream cheese thoroughly to save time later. Then mix the cheese with sour cream before folding in the salmon and your herbs. This order ensures everything comes together smoothly, avoiding any lumpy disappointments. Add Your Touch to Smoked Salmon Cream Cheese Dip Feel free to swap fresh dill for chives or even add a splash of hot sauce for a kick. You can also tailor the dip with cream cheese alternatives like Greek yogurt for a lighter version or even experiment with smoked trout for a different flavor profile. Storing & Reheating Smoked Salmon Cream Cheese Dip Store the dip in an airtight container in the refrigerator for up to three days. If you want to serve it warm, pop it in the microwave for about 30 seconds, stirring halfway through for even heating. Sharing this dip at a family gathering sparked a delightful conversation around the table, with everyone reminiscing about their fond memories of seafood gatherings. Each taste brought laughter and the realization of just how versatile this dip could be, creating moments as tasty as the dish itself. FAQs About Smoked Salmon Cream Cheese Dip What is Smoked Salmon Cream Cheese Dip? Smoked Salmon Cream Cheese Dip is a delightful appetizer that pairs perfectly with crackers, bread, or vegetable sticks. Made from a blend of softened cream cheese, sour cream, and finely chopped smoked salmon, it boasts a rich and creamy texture. Fresh herbs like dill or chives enhance its flavor, while a touch of lemon juice adds brightness. This dip is not only easy to prepare but also adaptable, making it a favorite for parties, gatherings, or a cozy night in with friends. How long can you store Smoked Salmon Cream Cheese Dip? You can store Smoked Salmon Cream Cheese Dip in an airtight container in the refrigerator for up to three days. To maintain its freshness and flavors, ensure the lid is tightly sealed. If you plan
Delicious Buttery Stuffed Artichokes Recipe for Home Chefs
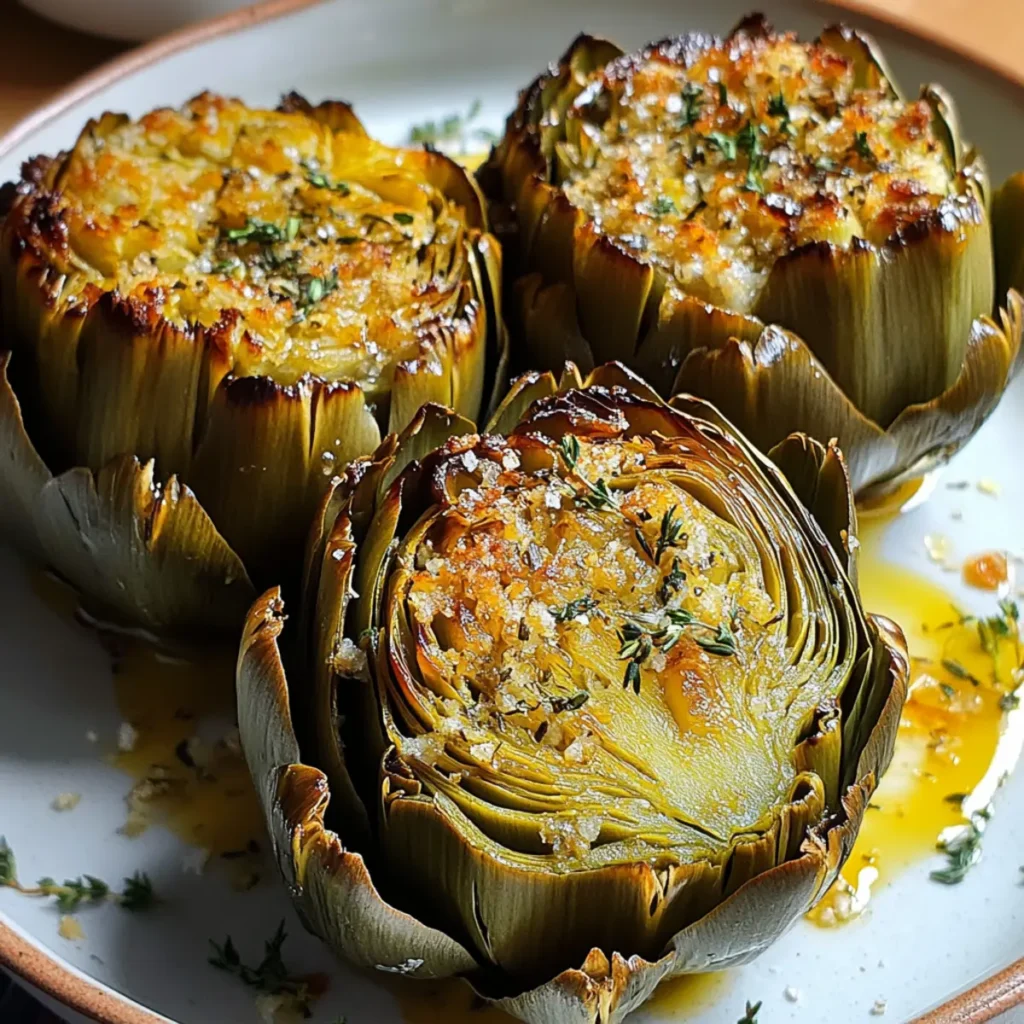
The aroma of roasted garlic and melted butter wafts through the kitchen, placing you in a culinary dream. Imagine sinking your teeth into tender artichoke leaves, each stuffed with a buttery, savory mixture that just dances on your taste buds. Welcome to a world of deliciousness with Buttery Stuffed Artichokes, a dish that brings the comfort of homemade meals and the flair of fine dining right to your dining table. There’s something magical about gathering around a plate of artichokes, peeling back the layers and revealing the golden stuffing. This recipe doesn’t just satisfy hunger; it wraps you in warmth and nostalgia, perfect for family dinners or impressing friends at your next gathering. So, are you ready to unlock the secrets of this gourmet delight? Ingredients for Buttery Stuffed Artichokes Here’s what you’ll need to make this delicious Buttery Stuffed Artichokes: 4 medium to large Fresh artichokes – Select firm artichokes with tight leaves for the best flavor and texture, avoiding any with brown spots or wilted leaves. 2 tablespoons Lemon juice – Freshly squeezed lemon juice brightens the dish and helps prevent the artichokes from browning. 1 cup Breadcrumbs – Use unseasoned breadcrumbs for a neutral base that absorbs all the delicious flavors from the other ingredients. 1/2 cup Parmesan cheese – Freshly grated is the way to go; it melts beautifully and adds depth to the stuffing. 3 cloves Garlic – Minced garlic elevates the flavor, making each bite aromatic and savory. 1/4 cup Fresh parsley – Chopped parsley not only adds a burst of color but also a fresh, earthy flavor to balance the richness of the butter. 1/2 cup Butter – Use unsalted butter for control over the saltiness, ensuring a rich and creamy filling. 1 teaspoon Salt – Essential for bringing out all the flavors, but be mindful as the Parmesan will also add saltiness. 1 teaspoon Pepper – Freshly cracked black pepper adds a bit of heat and enhances the overall flavor. 1/2 teaspoon Crushed red pepper flakes – Optional, but a bit of heat creates a delightful contrast to the buttery stuffing. How to Make Buttery Stuffed Artichokes Follow these simple steps to prepare this delicious Buttery Stuffed Artichokes: Step 1: Preheat Your Oven Preheat the oven to 375°F (190°C). This step is crucial as it gets the temperature just right for those artichokes to roast beautifully. Step 2: Prepare the Artichokes Trim the stems of the artichokes and carefully pull off the outer leaves to reveal the tender inner leaves. Use kitchen scissors to snip the sharp tips of the leaves if they’re particularly prickly. Rinse them under cold water to remove any grit. Step 3: Make the Stuffing In a mixing bowl, combine breadcrumbs, Parmesan cheese, minced garlic, chopped parsley, melted butter, salt, pepper, and crushed red pepper flakes. Mix thoroughly until all the ingredients are well incorporated and the mixture resembles a moist crumble. Step 4: Stuff the Artichokes Gently pry open the leaves of the artichokes and stuff the breadcrumb mixture into each leaf, pushing it down with your fingers. Don’t be shy here—make sure each leaf is filled so that every bite is packed with flavor. Step 5: Bake the Artichokes Place the stuffed artichokes in a baking dish and pour about an inch of water into the dish to create steam for the artichokes. Cover with foil to retain moisture and bake for 60 minutes, or until the leaves are tender and easily pull away. Step 6: Serve and Enjoy Once baked, let them cool for a few minutes before serving. Transfer to plates with a drizzle of any leftover melted butter from the baking dish for that extra touch of indulgence. Enjoy every single bite of your exquisite Buttery Stuffed Artichokes! So there you have it—Buttery Stuffed Artichokes that not only tantalize your taste buds but also fill your home with an inviting aroma that beckons everyone to the table. This dish is more than just a recipe; it’s an experience! This showstopping Buttery Stuffed Artichokes delivers restaurant-quality results using simple ingredients you probably already have at home. The perfect balance of textures and flavors creates an unforgettable dining experience that will have everyone asking for seconds. Picture-perfect presentation with vibrant colors makes this dish absolutely Instagram-worthy and guaranteed to impress any dinner guest. Incredibly versatile recipe that works beautifully for weeknight dinners, meal prep, special occasions, or even outdoor entertaining sessions. Perfecting Buttery Stuffed Artichokes Cooking Process Start by prepping your artichokes, trimming the stems, and removing the outer leaves. As you mix your stuffing, let the butter melt gently on low heat for a silky texture. Finally, stuff the artichokes before placing them in the oven to bake while you set up the dining table; multitasking is key! Add Your Touch to Buttery Stuffed Artichokes Feel free to customize your stuffing! Swap out the Parmesan for feta or goat cheese for a tangy twist. You can also mix in chopped sun-dried tomatoes, olives, or even crumbled bacon to amp up the flavor. The possibilities are endless! Storing & Reheating Buttery Stuffed Artichokes Store leftover stuffed artichokes in an airtight container in the refrigerator for up to three days. To reheat, place them in a baking dish, add a splash of water to keep them moist, and cover with foil before baking at 350°F until warmed through. One time, I made these fabulous Buttery Stuffed Artichokes for a family gathering, and my cousin declared them “life-changing.” It’s moments like those that remind me why I love cooking—nothing beats sharing good food with loved ones! FAQs About Buttery Stuffed Artichokes What are Buttery Stuffed Artichokes? Buttery Stuffed Artichokes are a delectable dish made by stuffing fresh artichokes with a scrumptious mixture of breadcrumbs, Parmesan cheese, garlic, and herbs. This Italian-inspired delicacy strikes a perfect balance between rich buttery flavors and the unique taste and texture of artichokes. Each petal is filled with a savory mixture, making them not only a fantastic appetizer but also a
Delicious Smashed Broccoli Recipe with Garlic and Lemon Drizzle

There’s something undeniably comforting about a bowl of Smashed Broccoli. Imagine vibrant green florets, tender yet crisp, dressed in a luscious drizzle of garlic and lemon. This dish not only offers an explosion of flavors but also brings a delightful crunch to your plate. Smashed Broccoli is not just a side; it’s an experience that transports you back to cozy family dinners or sun-lit picnics with friends. Now picture this: it’s a lazy Sunday afternoon, and your house is filled with the aroma of garlic sizzling in olive oil. You can’t help but feel a wave of nostalgia as you remember your grandmother standing over the stove, wielding her wooden spoon like a magic wand, creating culinary wonders. This Smashed Broccoli recipe captures that spirit beautifully, making it the perfect accompaniment for weeknight meals or special gatherings alike. Ingredients for Smashed Broccoli Here’s what you’ll need to make this delicious Smashed Broccoli: 4 cups fresh broccoli florets – Choose bright green florets that are firm and unopened for the freshest taste and texture. 2 tablespoons extra virgin olive oil – A high-quality olive oil adds depth and richness to this dish. 3 garlic cloves, minced – Freshly minced garlic provides a punch of flavor that pairs perfectly with broccoli. Salt and pepper to taste – Essential seasonings that enhance the natural flavors of the broccoli. Juice of 1 lemon – The acidity of lemon juice balances out the dish beautifully, adding brightness and freshness. How to Make Smashed Broccoli Follow these simple steps to prepare this delicious Smashed Broccoli: Step 1: Blanch the Broccoli Bring a large pot of salted water to a boil. Once boiling, add the broccoli florets and blanch them for 3-4 minutes until they turn a vibrant green and are slightly tender. Step 2: Ice Bath Time! Immediately transfer the blanched broccoli to an ice bath. This stops the cooking process and preserves the bright color and crispness. Step 3: Smash It! Drain the broccoli well and place the florets on a clean surface. Using the bottom of a glass or a potato masher, gently smash each floret. Aim for a rough, textured smash—this will help absorb all the delicious flavors later. Step 4: Sauté the Garlic In a skillet over medium heat, add the extra virgin olive oil along with the minced garlic. Sauté for about one minute until the garlic becomes fragrant, stirring to prevent burning. Step 5: Combine and Season Add the smashed broccoli to the skillet with the sautéed garlic. Season generously with salt and pepper, tossing to ensure even coverage and integration of flavors. Step 6: Add the Lemon Drizzle Just before serving, squeeze the juice of one lemon over the broccoli and give it another toss. This zesty touch will elevate your Smashed Broccoli to new heights. Now that you have a gorgeous dish of Smashed Broccoli ready, it’s time to dig in. You could serve it as a colorful side with grilled chicken or fish, or toss it in a bowl with quinoa for a light yet satisfying meal. Get ready for a delightful crunch and an explosion of flavor with every bite! This simple recipe will become a staple in your kitchen, and I can guarantee there will be smiles all around the dinner table. Enjoy this delicious Smashed Broccoli, and may it bring you as much joy as it does to my family! Perfecting Smashed Broccoli Cooking Process To achieve perfect Smashed Broccoli, start by blanching the florets in boiling salted water for a few minutes. Next, quickly transfer them to an ice bath to maintain that beautiful green color and then smash them gently before sautéing with garlic and olive oil for maximum flavor. Add Your Touch to Smashed Broccoli Feel free to customize your Smashed Broccoli by adding red pepper flakes for a spicy kick or tossing in some grated Parmesan cheese for a creamy touch. You can also experiment with different herbs like thyme or oregano to bring in new flavors. Storing & Reheating Smashed Broccoli Store leftover Smashed Broccoli in an airtight container in the fridge for up to three days. When reheating, gently warm it in a skillet over low heat to preserve its texture and flavors without overcooking. After making this delightful Smashed Broccoli, I remember serving it at a family gathering, and the proud look on my mom’s face was priceless! She loved it so much that she insisted it had to be part of all our future dinners. FAQs About Smashed Broccoli What is Smashed Broccoli? Smashed Broccoli is a delightful vegetable dish made by blanching fresh broccoli florets, smashing them gently for a rustic look, and then sautéing them with garlic and olive oil. This method not only retains the vibrant green color but also enhances the flavor profile, making it a healthier and more appealing side dish. Its simplicity and versatility allow it to shine at dinner tables, whether it’s a casual family meal or a fancy gathering. This dish highlights the natural goodness of broccoli while adding a savory twist that’s sure to please. How do you prepare Smashed Broccoli? To prepare Smashed Broccoli, start by boiling a pot of salted water, then blanch the broccoli florets for a few minutes until they become bright green and slightly tender. After this, plunge them into an ice bath to stop the cooking process and maintain that beautiful hue. Once cooled, gently smash each floret using a glass or similar object. This step helps in creating a unique texture that soaks up flavors well when sautéed in garlic and olive oil. Can I add other ingredients to Smashed Broccoli? Absolutely! Smashed Broccoli is incredibly versatile. You can elevate the dish by adding red pepper flakes for a spicy kick or sprinkling some grated Parmesan cheese for a creamy finish. Other ingredients like lemon zest, toasted nuts, or fresh herbs such as thyme or oregano can introduce new flavors and textures, allowing you to tailor the dish to
Delicious Seven Layer Dip Recipe for Your Next Fiesta Party
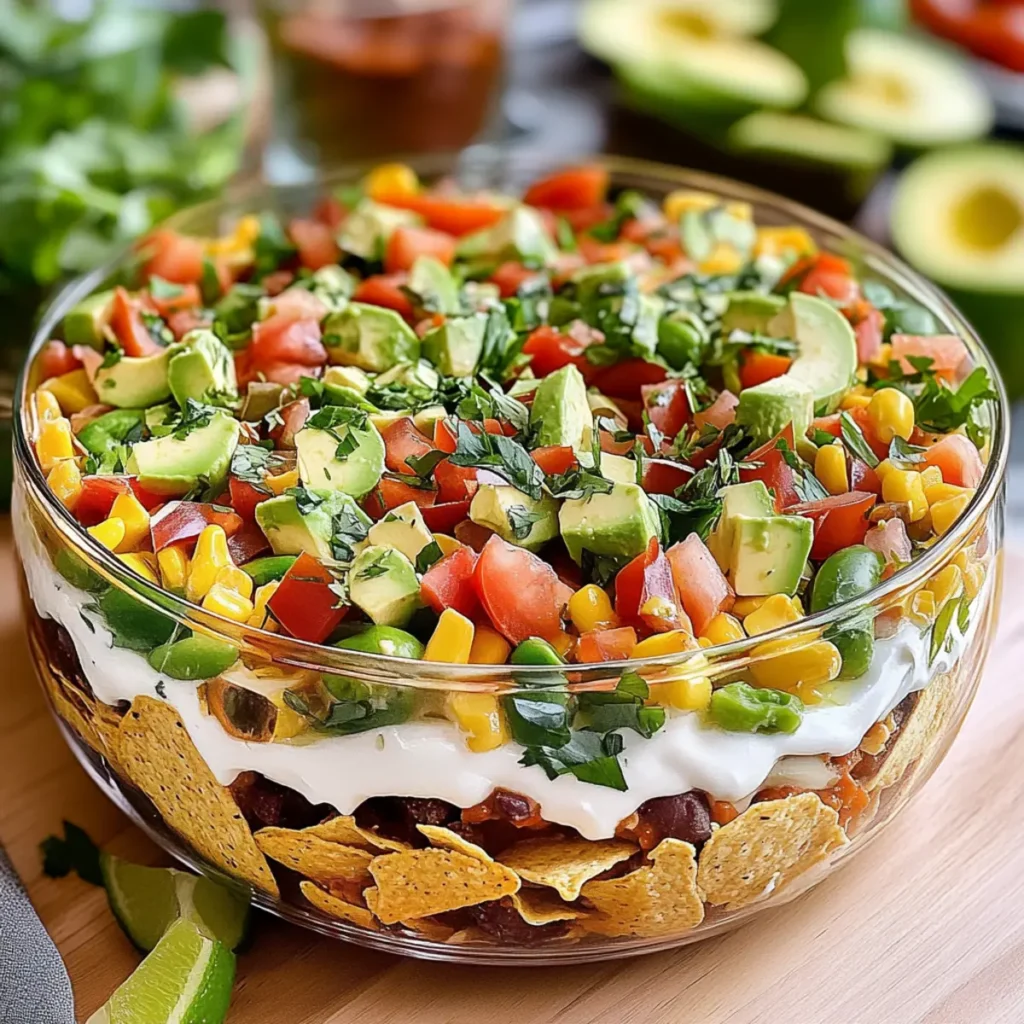
Every fiesta needs a star, and there’s no question that the Seven Layer Dip takes that spotlight. This dazzling dish boasts layer after layer of colorful, creamy goodness, drawing everyone in with its tantalizing aromas that scream, “Eat me!” Just the sight of it, all those vibrant layers mingled together, brings back memories of carefree gatherings and laughter-filled evenings. Picture this: friends lounging on a sunny patio, chips in hand, dipping into that beautiful concoction of flavors. The creaminess of the guacamole, the tang of salsa, and a hint of spice make every bite an explosion of taste that’s simply irresistible. Whether it’s game day, a summer BBQ, or just because it’s Tuesday, serving up a Seven Layer Dip will undoubtedly elevate the vibe and get the taste buds tingling. Ingredients for Seven Layer Dip Here’s what you’ll need to make this delicious Seven Layer Dip: 1 can (15 oz) refried beans – these provide a creamy base and a hearty foundation for all the layers. Look for a brand that uses organic beans for the best flavor. 1 cup guacamole – smooth and creamy, adding a vibrant green layer that’s irresistible. You can make your own or buy pre-made, but be sure it contains ripe avocados. 1 cup sour cream – for a cool, tangy contrast to the spices and flavors in the dip. Opt for full-fat for that luscious creaminess. 1 cup salsa (chunky or smooth) – pick your favorite! Each adds a unique twist, so choose based on your texture preference. 1 cup shredded cheddar cheese – this adds a rich, savory layer that everyone loves. Choose sharp cheddar for an extra kick of flavor. 1/2 cup chopped green onions – bright and fresh, they add a lovely crunch and oniony zing to the top of your dip. 1/2 cup sliced black olives (optional) – for those who enjoy a briny flavor, adding the olives will bring this dish full circle. How to Make Seven Layer Dip Follow these simple steps to prepare this delicious Seven Layer Dip: Step 1: Layer the Refried Beans Start by selecting a clear serving dish to showcase the beauty of your dip. Spread the can of refried beans evenly at the bottom, pressing it down gently to create a solid foundation for the layers to come. This is like laying the groundwork for a flavorful masterpiece! Step 2: Spread the Guacamole Next, take that glorious, green guacamole and spread it generously over the beans, ensuring that every inch is covered. This creamy layer not only tastes fantastic but also provides a lovely color contrast that will make your dip visually enticing. Step 3: Add the Sour Cream Now, it’s time for the sour cream. Spoon it atop the guacamole, smoothing it out for an even layer. If you want to amp up the flavor, feel free to mix in a packet of taco seasoning into the sour cream before spreading it, giving this dip an extra zing. Step 4: Spoon on the Salsa Time to bring some zing into the mix! Take your salsa and spoon it over the sour cream layer, making sure to cover it completely. This layer should be a burst of color and flavor—choose your salsa wisely, depending on your spice tolerance. Step 5: Sprinkle the Cheese Now, for the pièce de résistance: loading that shredded cheese onto your salsa layer, sprinkling it generously. Oh yes, this is the moment where all the cheesy dreams come true. Step 6: Top with Green Onions and Olives Finally, finish off your Seven Layer Dip by scattering the chopped green onions and sliced black olives on top. This adds a pop of freshness and a touch of savory brine, respectively. The colors should now be bright, and the aroma delectable. Serve your Seven Layer Dip chilled or at room temperature with a side of corn tortilla chips for the ultimate dipping experience. With its vibrant layers and incredible flavors, you’ll find your guests lining up for a second (or third) helping! Enjoy every delightful bite as you unwind and savor the moment. This showstopping Seven Layer Dip delivers restaurant-quality results using simple ingredients you probably already have at home. The perfect balance of textures and flavors creates an unforgettable dining experience that will have everyone asking for seconds. Picture-perfect presentation with vibrant colors makes this dish absolutely Instagram-worthy and guaranteed to impress any dinner guest. Incredibly versatile recipe that works beautifully for weeknight dinners, meal prep, special occasions, or even outdoor entertaining sessions. Perfecting Seven Layer Dip Cooking Process To make your Seven Layer Dip a breeze, start with the refried beans at the bottom layer, followed by guacamole. Then smoothly spread the sour cream and salsa before layering on the cheese. Finish with green onions and olives for that perfect pop. Add Your Touch to Seven Layer Dip Feel free to swap out ingredients based on your pantry. Use cream cheese for an extra rich layer, or spice up your guacamole with jalapeños. You could also add corn or diced tomatoes for an extra burst of flavor and texture. Storing & Reheating Seven Layer Dip Store any leftovers in an airtight container in the fridge for up to three days. For best results, avoid freezing as it may alter the texture. To enjoy warm flavors again, simply let it sit at room temperature before serving. Sharing this dip at a friends’ game night turned out to be a showstopper, with two of my friends fighting over the last scoop—it was a proud chef moment! FAQs About Seven Layer Dip What is Seven Layer Dip? Seven Layer Dip is a vibrant and delicious appetizer that features layers of flavorful ingredients, typically served with tortilla chips. Each layer usually includes refried beans, guacamole, sour cream, salsa, cheese, green onions, and olives. This dish not only brings a colorful presentation to your table but also offers a delightful mix of textures and flavors that make it a crowd favorite, especially at
Deliciously Crispy Honey Garlic Salmon Bites Recipe in 25 Minutes

There’s something incredibly special about the moment when delicious aromas fill your kitchen, making it feel like the best kind of restaurant right at home. The crispy, savory, and sweet flavors of these Crispy Honey Garlic Salmon Bites are truly unforgettable, from the first delightful crunch to the last satisfying bite. Imagine hosting a dinner where these little gems are center stage, their allure drawing everyone in faster than you can say “dinner’s served.” It’s a dish that promises you’ll be the talk of the evening—not to mention the delightful crispiness will make you feel like a culinary magician. Whether you’re prepping for a casual weeknight feast, a fancy dinner party, or a cozy date night, these Crispy Honey Garlic Salmon Bites will have everyone raving! They’re not only delicious but also easy to make, meaning you can spend more time enjoying the company of your loved ones and less time slaving away in the kitchen. And let’s be honest—who doesn’t want to impress guests with a dish that looks like it belongs in a magazine? Ingredients for Crispy Honey Garlic Salmon Bites Here’s what you’ll need to make this delicious Crispy Honey Garlic Salmon Bites: 1 lb fresh salmon fillets – Look for vibrant, firm salmon with minimal fishy odor; this will ensure the best texture and flavor. 1/4 cup honey – Use pure, natural honey for a balanced sweetness that enhances the overall dish. 3 cloves garlic, minced – Fresh garlic packs a punch, providing an aromatic base that elevates the flavors. 2 tbsp low-sodium soy sauce – Opt for low-sodium to keep the dish savory without overwhelming saltiness. 1 tbsp lemon juice – Freshly squeezed lemon juice adds brightness that cuts through the richness of the salmon. 1/4 cup cornstarch – This will give your salmon bites that irresistible crispy coating we all love. 1 tbsp sesame oil – A splash of sesame oil adds a nutty note that perfectly complements the other flavors. 2 green onions, chopped (for garnish) – These add a fresh touch and a pop of color, making your dish more visually appealing. How to Make Crispy Honey Garlic Salmon Bites Follow these simple steps to prepare this delicious Crispy Honey Garlic Salmon Bites: Step 1: Prepare the Salmon Begin by cutting your fresh salmon fillets into bite-sized pieces—about 1-inch cubes. Pat them dry using paper towels. Dry salmon helps achieve that desired crispiness when they’re cooked. Step 2: Create the Sauce In a medium bowl, whisk together the honey, low-sodium soy sauce, minced garlic, sesame oil, and freshly squeezed lemon juice until well combined. This sweet and tangy mixture is the secret to getting those delightful flavors into your salmon. Step 3: Coat the Salmon Toss the salmon pieces in cornstarch until they are lightly coated. This step is vital; the cornstarch forms a crunchy barrier that locks in moisture and maximizes that satisfying crunch when cooked. Step 4: Cook the Salmon Bites Heat a non-stick skillet over medium-high heat and add a drizzle of oil to it. Once the oil is hot, work in batches to cook the salmon for about three minutes on each side or until they are golden brown and crispy. Resist the urge to move them around too much; let them sit so that beautiful crust can form. Step 5: Glaze the Salmon Once all the salmon pieces are cooked, pour the honey garlic sauce over them in the skillet. Allow everything to simmer for around two minutes, letting that sauce thicken and glaze each piece of salmon beautifully. Step 6: Serve and Garnish Gently transfer the glazed salmon bites onto serving plates. Garnish with freshly chopped green onions for a touch of color and a crisp bite. Serve immediately to enjoy the crackling crispiness and delicious flavor while it lasts! With these steps, you’ll have an impressive dish ready in just 25 minutes flat. Whether you pair it with some steamed veggies for a wholesome meal or pile them high on a platter for your guests to snack on, these Crispy Honey Garlic Salmon Bites are sure to steal the show! Perfecting Crispy Honey Garlic Salmon Bites Cooking Process Start by preparing the sauce while you cut the salmon into bite-sized pieces. Pat them dry for extra crispiness, coat with cornstarch, and then cook them in batches for the perfect golden-brown finish. Add Your Touch to Crispy Honey Garlic Salmon Bites Feel free to swap salmon for other fish like trout or even chicken for a twist. You could also spice it up with a pinch of red pepper flakes for some heat or add sesame seeds for an extra crunch. Storing & Reheating Crispy Honey Garlic Salmon Bites Store leftovers in an airtight container in the fridge for up to two days. To reheat, use a skillet over low heat to keep the bites crispy instead of soggy in the microwave. Sometimes, when I whip up these Crispy Honey Garlic Salmon Bites, I swear I can hear my friends cheering like it’s game day—everyone loves them, and I usually end up sharing the recipe for them to recreate at home! FAQs About Crispy Honey Garlic Salmon Bites What is Crispy Honey Garlic Salmon Bites? Crispy Honey Garlic Salmon Bites are bite-sized pieces of salmon fillets that are coated in cornstarch and pan-fried to a golden crisp. They are tossed in a flavorful sauce made of honey, soy sauce, minced garlic, sesame oil, and lemon juice, creating a perfect balance of sweetness and savory goodness. This dish is beloved for its delightful texture and taste, making it a crowd-pleaser whether served as an appetizer or a main course. How do I make the salmon extra crispy? To achieve the perfect crispiness that everyone craves, ensure you pat the salmon pieces dry before coating them with cornstarch. This step helps absorb any excess moisture. Additionally, frying the salmon pieces in small batches allows them to cook evenly and develop a beautiful golden-brown crust. Using a high
Easy Crockpot Spinach Artichoke Dip Recipe for Ultimate Snacking
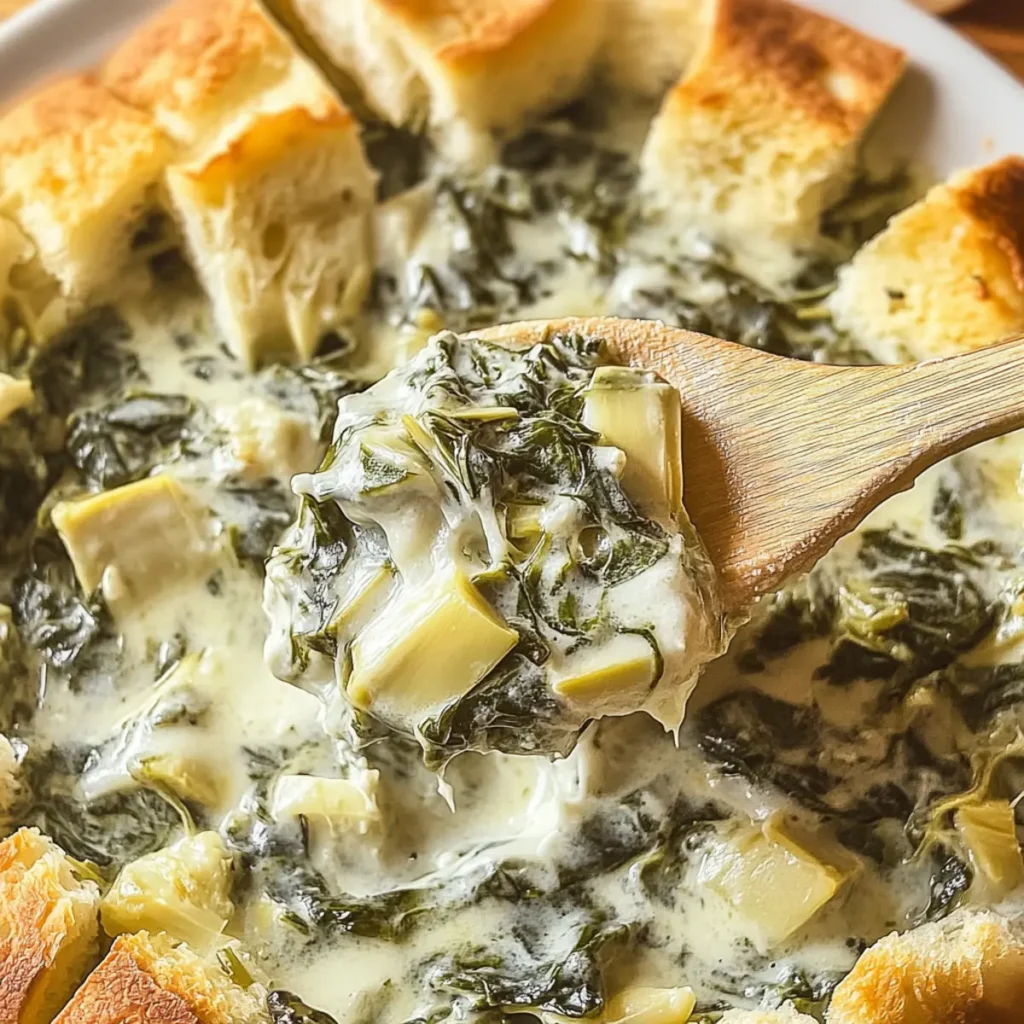
This creamy, dreamy Crockpot Spinach Artichoke Dip is what every snack lover’s dreams are made of. Imagine the warm, cheesy goodness bubbling away in your crockpot, filling your kitchen with the aroma of garlic and melted mozzarella. As you dip a crispy tortilla chip into this luscious blend of spinach and artichokes, the flavor explosion dances on your palate, making every gathering a delicious hit. This delightful dip holds a special place in my heart, often making an appearance at game nights, potlucks, or cozy movie marathons with friends. The best part? It’s ridiculously easy to prepare, letting you enjoy the festivities instead of being stuck in the kitchen. Get ready to elevate your snacking game with this irresistible recipe! Ingredients for Crockpot Spinach Artichoke Dip Here’s what you’ll need to make this delicious Crockpot Spinach Artichoke Dip: 10 ounces fresh spinach – Look for vibrant, dark green leaves; they’ll cook down beautifully and add a nutritious punch. 14 ounces canned artichoke hearts – Make sure they’re drained well; their tangy flavor is crucial for that classic dip taste. 8 ounces cream cheese – Softened to room temperature for easy mixing; this is what makes your dip creamy and luscious. ½ cup sour cream – Use full-fat for the best taste; it adds tang and creaminess to the dip. 1 cup shredded mozzarella cheese – Opt for whole milk mozzarella for gooey, stretchy goodness. ¼ cup grated Parmesan cheese – This adds a nutty depth of flavor; feel free to use freshly grated for a fresher taste. 1 teaspoon garlic powder – This adds a nice kick; if you’re a garlic lover, don’t hesitate to add a bit more. Salt and pepper to taste – Simple seasonings that elevate the dip; taste as you go! How to Make Crockpot Spinach Artichoke Dip Follow these simple steps to prepare this delicious Crockpot Spinach Artichoke Dip: Step 1: Prepare the Spinach Begin by washing and coarsely chopping the fresh spinach. Make sure you remove any tough stems. This green goodness is the heart of this dish! Step 2: Mix the Base In a mixing bowl, combine the softened cream cheese, sour cream, garlic powder, salt, and pepper. Stir until the mixture is smooth and creamy. You want your dip base to be irresistible from the start. Step 3: Fold in the Goodness Gently fold in the chopped spinach and drained artichokes. Take your time here; you want those flavors to intermingle beautifully without losing the texture of your ingredients. Step 4: Cheese, Please! Stir in the shredded mozzarella and grated Parmesan cheese until everything is evenly mixed. Feel free to sneak a taste—quality control is key! Step 5: Transfer to the Crockpot Grease your crockpot with a little cooking spray and transfer the mixture in. Spread it out evenly to ensure even cooking. Step 6: Let it Cook Cover the crockpot and set it to low for about 2 hours. Your patience will be rewarded as the dip becomes bubbly and golden. To serve, scoop it up warm with tortilla chips, baguette slices, or even fresh veggies. I dare you to keep your guests’ hands out of the bowl—it’s that good! There’s something magical about a Crockpot Spinach Artichoke Dip. It’s not just a dish; it’s a celebration of flavors, friends, and good times. So, whether you’re hosting a gathering or just indulging in a cozy night in, this dip is your ticket to culinary bliss. Get ready for compliments, and don’t forget to enjoy the leftovers (if there are any)! Perfecting Crockpot Spinach Artichoke Dip Cooking Process To achieve the perfect Crockpot Spinach Artichoke Dip, start by preparing all your ingredients before you begin cooking. Combine the creamy base, fold in the greens and artichokes, then transfer everything to the crockpot for an effortless cooking experience that yields maximum flavor. Add Your Touch to Crockpot Spinach Artichoke Dip Feel free to customize your Crockpot Spinach Artichoke Dip! You can swap out cream cheese for Greek yogurt for a tangy twist or experiment with different cheese options like pepper jack or gouda for added flavor. Storing & Reheating Crockpot Spinach Artichoke Dip Store any leftovers in an airtight container in the fridge for up to three days. To reheat, simply warm it in the microwave or on the stovetop, stirring gently until bubbly and delicious again. The first time I made this dip for a gathering, my friends couldn’t get enough! Watching them devour it and wanting the recipe felt incredibly rewarding and confirmed I’m on the right track with those creamy, cheesy flavors. FAQs About Crockpot Spinach Artichoke Dip What is Crockpot Spinach Artichoke Dip? Crockpot Spinach Artichoke Dip is a creamy, savory appetizer that combines fresh spinach and artichoke hearts with a melty blend of cheeses. Cooking it in a slow cooker allows for a hands-off approach, resulting in a rich and flavorful dip perfect for gatherings, game days, or cozy nights in. The dish is typically served warm with tortilla chips, baguette slices, or even fresh veggies for dipping. It’s one of those crowd-pleasers that’s easy to whip up and sure to impress your guests! How can I customize my Crockpot Spinach Artichoke Dip? Customizing your Crockpot Spinach Artichoke Dip is a fun way to make it your own! You can swap out the cream cheese for Greek yogurt for a lighter, tangy option or mix in different cheeses like pepper jack for a spicy kick. Adding sun-dried tomatoes, olives, or even cooked bacon can elevate the flavors further. Don’t be afraid to experiment; after all, cooking is about trying new things and making it fun! How do I store and reheat leftover Crockpot Spinach Artichoke Dip? Storing leftover Crockpot Spinach Artichoke Dip is straightforward! Simply transfer any remnants to an airtight container and keep it in the refrigerator for up to three days. To reheat, you can microwave it in short intervals, stirring in between to get it nice and creamy again, or warm it slowly on
Delicious Cowboy Caviar Recipe: Quick and Easy Party Dip
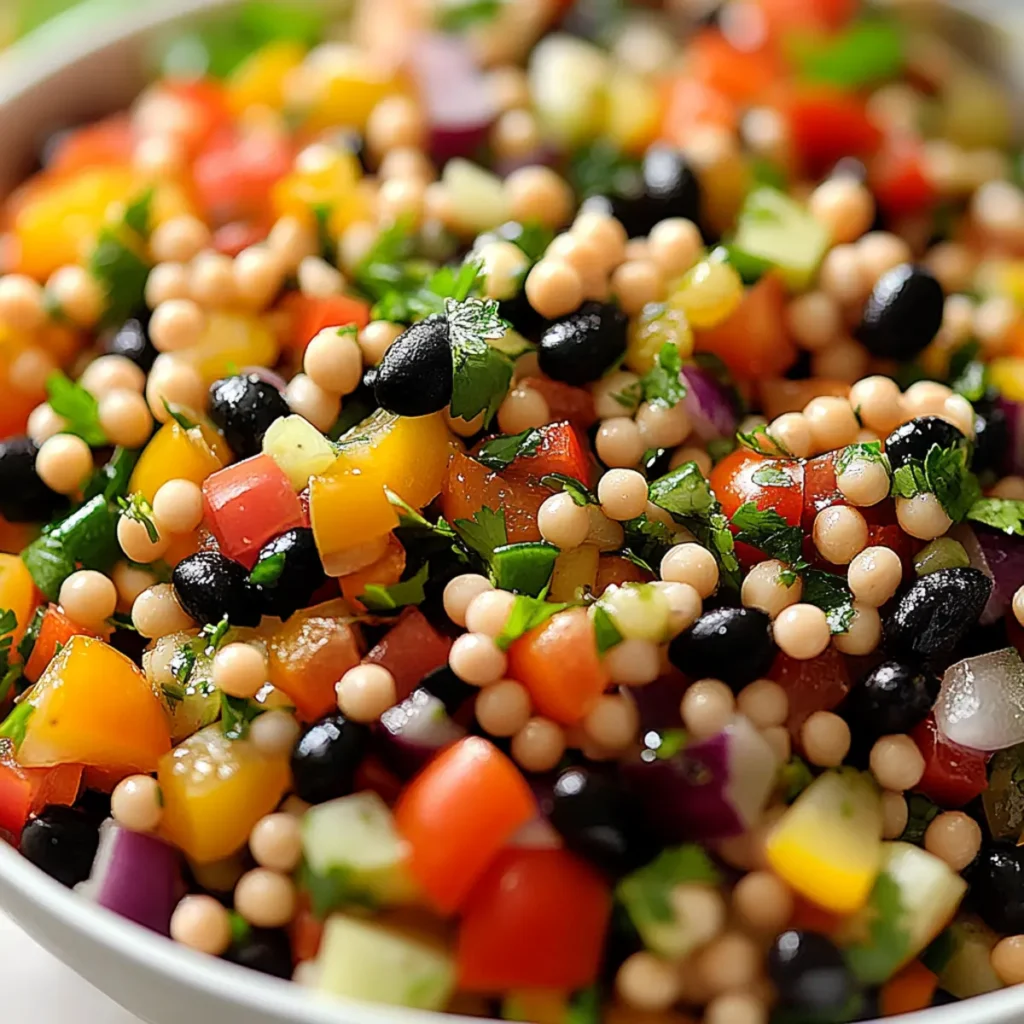
There’s something about the vibrant colors and zesty flavors of Cowboy Caviar that just screams celebration! This dish is a delightful blend of fresh ingredients, combining the creamy avocado, crunchy peppers, and hearty black beans, topped off with a zing of lime. Whether you’re indulging in a backyard barbecue or trying to impress guests at a dinner party, this dip is sure to be the star of your spread. I remember the first time I made Cowboy Caviar; I was trying to channel my inner cowboy (without the whole riding horses thing). I recall my friend’s skeptical face turning into pure joy with each crunchy scoop. It’s versatile and fun to serve, almost like a salsa but with more flair—it’s a perfect excuse for enjoying tortilla chips while feeling fancy! Ingredients for Cowboy Caviar Here’s what you’ll need to make this delicious Cowboy Caviar: 1 can (15 oz) black beans – Rinsed and drained to cut down on the sodium, these beans add protein and heartiness. 1 cup cherry tomatoes – Diced for a sweet burst of flavor and vibrant color. 1/2 medium red onion – Finely chopped to give a tangy crunch without overpowering the dish. 1 ripe avocado – Diced to add a creamy texture and rich taste; it’s best to use a gently ripe one. 1/4 cup fresh cilantro – Chopped fresh for that aromatic lift and added freshness. 2 tbsp fresh lime juice – Brightens up the flavors and brings the entire dish together. 1 jalapeño – Diced (optional) for those who like a spicy kick; feel free to adjust according to your heat preference. 2 tbsp olive oil – A good drizzle not only adds flavor but helps balance the dish. Salt to taste – Essential for enhancing all those delicious flavors! How to Make Cowboy Caviar Follow these simple steps to prepare this delicious Cowboy Caviar: Step 1: Prepare Your Ingredients Start by dicing all your ingredients—cherry tomatoes, red onion, jalapeño (if using), avocado, and cilantro. Make sure to use a sharp knife to make this more enjoyable and effortless. Step 2: Combine the Black Beans In a large mixing bowl, combine the rinsed black beans with your beautifully diced vegetables. Take a moment to appreciate the burst of colors; it’s like a salad party in your bowl. Step 3: Add Your Flavor Boosters Drizzle in the fresh lime juice and olive oil, followed by a generous sprinkle of salt. This will help draw out the moisture from the veggies, infusing everything with scrumptious flavors. Step 4: Toss Gently With clean hands or a spatula, gently toss the mixture together, being careful not to mash the avocado. We want to keep the beautiful chunks intact, adding not just flavor but also a delightful visual appeal. Step 5: Taste Test Time It’s time to become your own food critic! Taste the Cowboy Caviar and adjust the seasoning if needed. A little more lime or salt can make a surprisingly big difference. Step 6: Chill (Optional) For an enhanced flavor experience, let the Cowboy Caviar sit in the fridge for at least an hour before serving—or dig in right away if you can’t wait. This dip is great served cold! This Cowboy Caviar is not just a recipe; it’s an experience waiting to happen. Whether you’re out in nature, hosting friends for a game night, or just treating yourself on a quiet evening, it’s perfect for scooping up with crispy tortilla chips or even fresh veggies. The compliments will roll in! Perfecting Cowboy Caviar Cooking Process Start by dicing your vegetables and rinsing the black beans to save time. Then, mix everything in a bowl, ensuring your avocado stays intact, and finish with a drizzle of lime juice and olive oil for the freshest flavor. Add Your Touch to Cowboy Caviar Feel free to swap black beans for chickpeas or add corn for sweetness. A sprinkle of cumin or smoked paprika can elevate the flavor profile, while diced red bell pepper adds a crunch and sweetness. Storing & Reheating Cowboy Caviar Store Cowboy Caviar in an airtight container in the fridge for up to three days. If the flavors need a boost later, add a splash of lime juice before serving to refresh the taste and brightness. Sometimes, I whip up a batch of Cowboy Caviar for last-minute gatherings, and it’s always the crowd-pleaser! My friends rave about how fresh and vibrant it tastes, with that perfect crunch that keeps everyone coming back for more. FAQs About Cowboy Caviar What is Cowboy Caviar? Cowboy Caviar is a vibrant and flavorful bean salad that combines black beans, fresh vegetables, and zesty dressing into a delightful dip or side dish. Originating from the Southwestern United States, this dish showcases the beautiful explosion of colors and textures that appeal to both the eyes and the palate. It’s perfect for parties, potlucks, or simply as a healthy snack. The blend of ingredients, including tomatoes, avocado, and lime juice, creates a refreshing taste that is simply irresistible. How do I make Cowboy Caviar? Making Cowboy Caviar is straightforward and requires minimal cooking skills. Start by rinsing and draining a can of black beans. Dice your cherry tomatoes, red onion, jalapeño, and avocado, and chop some cilantro. In a mixing bowl, combine the beans with the diced vegetables. Drizzle fresh lime juice and olive oil over the mixture, adding salt to taste. Toss gently, and then serve immediately, or let it chill in the fridge to enhance the flavors. It’s that easy! Can I customize my Cowboy Caviar? Absolutely! Cowboy Caviar is incredibly versatile. You can easily swap black beans for chickpeas or kidney beans for a different flavor. Adding corn can introduce a touch of sweetness, while diced red bell peppers contribute a satisfying crunch. For a spicier kick, consider incorporating diced serrano peppers or a dash of cayenne. Feel free to experiment with spices like cumin or smoked paprika to elevate the flavors further. It’s your creation, so get
Delicious Loaded Smashed Potatoes Recipe for Perfect Appetizers

There’s something magical about roasted potatoes, especially when you take the time to load them up with delicious toppings. This Loaded Smashed Potatoes recipe is your golden ticket to potato perfection. Imagine crispy, edges giving way to soft, fluffy interiors that are blanketed in gooey cheese, crunchy bacon bits, and dollops of creamy sour cream. No wonder they are the life of the party, fitting for everything from cozy family dinners to lively gatherings with friends. Every time I make these Loaded Smashed Potatoes, I’m brought back to my childhood kitchen. My family would pile around the table, laughter echoing as we dug into a pan smeared with these golden nuggets of joy. They look splendid, taste even better, and let’s be real—who can resist a plate of potatoes generously dressed up for the occasion? Grab a fork and let’s dive into this delightful journey of flavors. Ingredients for Loaded Smashed Potatoes Here’s what you’ll need to make this delicious Loaded Smashed Potatoes: 1 pound baby Yukon Gold potatoes – These creamy and buttery potatoes are perfect for smashing, holding their shape well while becoming fluffy inside. 2 tablespoons olive oil – Adds flavor and helps achieve that irresistible crispy texture you crave. 1 cup shredded sharp cheddar cheese – The star of the show that melts beautifully and adds a sharp, savory flavor to the dish. ½ cup bacon bits – Because who doesn’t love bacon? These crunchy bits provide a delightful contrast to the creamy potatoes. ½ cup sour cream – A tangy finish that balances the richness from the cheese and bacon, making each bite utterly enjoyable. ¼ cup chopped green onions – These fresh, vibrant onions give a burst of color and a mild onion flavor, elevating the dish to a whole new level. Salt and pepper to taste – Simple seasoning that enhances all the delicious flavors in this already delectable dish. How to Make Loaded Smashed Potatoes Follow these simple steps to prepare this delicious Loaded Smashed Potatoes: Step 1: Preheat and Prep Preheat your oven to 425°F (220°C). While it’s heating up, wash your Yukon Gold potatoes thoroughly to remove any dirt. We want them sparkling clean for this amazing dish. Step 2: Boil Those Potatoes Place the washed potatoes in a pot and cover them with salted water. Bring to a boil and let them cook for about 15-20 minutes, or until they’re fork-tender. You’ll know they’re ready when a fork easily slides through without resistance. Step 3: Smash It Up Once the potatoes are cooked, drain them and let them cool slightly. Grab a baking sheet lined with parchment paper. Using the back of a fork or your palm, gently smash each potato until they are flattened but still holding together. Channel your inner potato artist here! Step 4: Season and Roast Drizzle the smashed potatoes with olive oil and sprinkle generously with salt and pepper. Toss them in the oven and bake for about 25-30 minutes, or until they’re crispy and golden brown. The aroma wafting from your oven will have everyone asking what’s cooking! Step 5: Load ‘Em Up Once your potatoes have reached that perfect crispiness, remove them from the oven. Sprinkle the shredded cheddar cheese and bacon bits on top and return them to the oven for an additional 5 minutes. You want that cheese melted and beautifully bubbling. Step 6: Serve with Style Take the potatoes out of the oven and top them off with generous dollops of sour cream and a sprinkle of green onions. Grab a fork, serve, and watch them disappear in seconds! Transfer to plates and drizzle with sour cream for the perfect finishing touch. Your friends and family are going to rave about these Loaded Smashed Potatoes! Now that you have the recipe down, remember that this dish is as versatile as you need it to be. You can swap out the cheese for a dairy-free option, use turkey bacon to lighten it up, or even toss in different toppings like jalapeños or roasted garlic for a little kick. The world is your oyster—or should I say potato? So next time you’re yearning for a comforting side dish or show-stopping appetizer, reach for this Loaded Smashed Potatoes recipe. Not only is it packed with flavor, but it also brings people together, creating not just a meal but memorable experiences. Happy cooking! Perfecting Loaded Smashed Potatoes Cooking Process Start by boiling the potatoes until fork-tender for the ideal texture. While they cool, preheat your oven to crisp them up perfectly. This order improves efficiency, getting you delicious loaded smashed potatoes in no time. Add Your Touch to Loaded Smashed Potatoes Feel free to switch things up! Try using different types of cheese, swap bacon for turkey bacon, or add spices like paprika or garlic powder for an extra kick. Your creativity can make every batch unique! Storing & Reheating Loaded Smashed Potatoes To store, place any leftovers in an airtight container and refrigerate for up to three days. To reheat, pop them back in the oven at 350°F until warmed through, keeping that crispy texture intact. Sometimes, the best feedback comes from the people we cook for. I once prepared loaded smashed potatoes for a family barbecue, and the compliments just kept coming! It felt great to see everyone enjoying something I created. FAQs About Loaded Smashed Potatoes What is Loaded Smashed Potatoes? Loaded smashed potatoes are a delightful twist on traditional mashed potatoes. Instead of creamy and smooth, these potatoes maintain their shape with a deliciously crispy exterior. By boiling baby Yukon Gold potatoes and smashing them slightly before baking, they become the perfect canvas for all your favorite toppings. With a combination of cheese, bacon bits, sour cream, and green onions, this dish packs a flavor punch that’s sure to impress at gatherings or family dinners. How do I make Loaded Smashed Potatoes extra crispy? To achieve that perfect crispiness when preparing loaded smashed potatoes, ensure you give them