
Delicious Caprese Dip Recipe: Fresh and Easy Appetizer
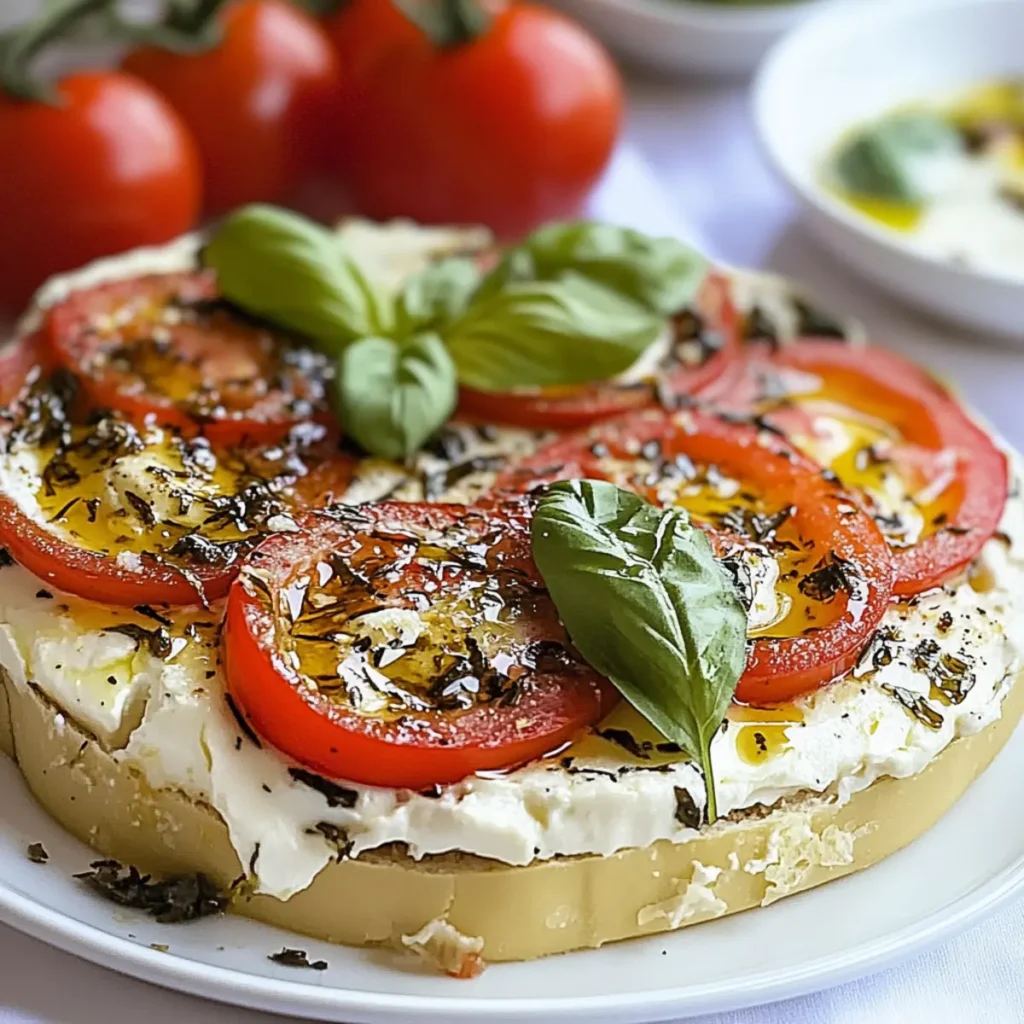
When you think of summer gatherings, can you smell the fresh basil wafting through the air? That’s exactly what you get with this delicious Caprese Dip, an irresistible blend of shiny mozzarella, fresh tomatoes, and fragrant basil, all taken up a notch with a balsamic drizzle that dances on your tongue. This dip isn’t just a tasty appetizer; it’s like a short vacation to Italy in a bowl. How can you resist? Picture this: you’ve got friends over, the sun is setting, and laughter fills the room as you all dig into your latest culinary creation. This is that creation. With every scoop, the bright flavors and creamy textures mingle effortlessly, making it a perfect accompaniment to a chill evening or a lively party. Set the stage for a fantastic flavor experience that certainly won’t disappoint. Ingredients for Caprese Dip Here’s what you’ll need to make this delicious Caprese Dip: 1 cup fresh mozzarella balls – Choose mozzarella balls packed in water for the freshest taste; they add a creamy texture to the dip. 1 cup ripe tomatoes, diced – Use Roma or vine-ripened tomatoes for a burst of juicy flavor; make sure they are at peak ripeness. ½ cup fresh basil leaves, chopped – Fresh basil brightens the dip and enhances its overall flavor profile; don’t skimp on the fresh stuff! 2 tbsp balsamic glaze – A drizzle of balsamic glaze adds a sweet tang that perfectly complements the creamy mozzarella and tomatoes. 2 tbsp extra virgin olive oil – Quality olive oil enriches the flavors and gives the dip a lovely silkiness. ½ tsp garlic powder – A touch of garlic powder infuses a savory richness; feel free to use fresh minced garlic for an extra kick! How to Make Caprese Dip Follow these simple steps to prepare this delicious Caprese Dip: Step 1: Preheat the Oven Preheat your oven to 400°F (200°C) to get things sizzling. This is not just any dip; it’s going to roast up some delicious tomatoes that bring out all their sweetness. Step 2: Roast the Tomatoes In a baking dish, spread your diced tomatoes evenly. Slide them into the oven for about 15 minutes, allowing them to soften and caramelize slightly. This step amps up their flavor, enhancing the entire dip. Step 3: Combine the Ingredients Once the tomatoes are roasted, grab a mixing bowl and combine them with the fresh mozzarella balls and chopped basil. The mix of hot tomatoes and cool mozzarella will offer a delightful texture contrast! Step 4: Dress It Up Drizzle the olive oil over the mix, then sprinkle on the garlic powder. Gently stir everything together to combine the flavors without squashing the mozzarella too much. You want those little balls of goodness intact! Step 5: Add the Final Touch Before serving, top it off with a generous swirl of balsamic glaze. This not only adds flavor but elevates the presentation to make your dish look utterly delicious. Step 6: Serve and Enjoy Transfer your Caprese Dip to a decorative dish, and serve it warm with crusty bread, crackers, or even crunchy vegetable sticks. Get ready for compliments – they are coming your way! With just 15 minutes of prep and 15 minutes of cook time, you’ll have a stunning appetizer ready in just half an hour. Just imagine the delightful giggles and chatter around your table as everyone digs in! This Caprese Dip is not only a feast for the taste buds but also a treat for the eyes. The vibrant reds of the tomatoes, the creamy whites of the mozzarella, and the bright greens of the basil come together for a truly picturesque dish. Just don’t forget to grab your phone and snap a few shots for Instagram before everyone dives in! In a world full of fast food and unhealthy snacks, this Caprese Dip offers a refreshing and healthy alternative while feeling indulgent at the same time. Its versatility means it’ll shine as a starter for a romantic dinner or as a comforting snack during a movie night. Let this dip become your next go-to recipe that not only satisfies hunger but also brings people together over shared love for flavor! So why wait? Gather your ingredients and experience the joy of making this delightful Caprese Dip today. Everyone will be chanting your name as the unofficial appetizer king or queen, and you’ll know it’s all thanks to this incredible blend of flavors! This showstopping Caprese Dip delivers restaurant-quality results using simple ingredients you probably already have at home. The perfect balance of textures and flavors creates an unforgettable dining experience that will have everyone asking for seconds. Picture-perfect presentation with vibrant colors makes this dish absolutely Instagram-worthy and guaranteed to impress any dinner guest. Incredibly versatile recipe that works beautifully for weeknight dinners, meal prep, special occasions, or even outdoor entertaining sessions. Perfecting Caprese Dip Cooking Process Start by roasting the tomatoes to bring out their sweetness, then mix them with fresh mozzarella and basil. Add olive oil and garlic powder before finishing with a drizzle of balsamic glaze for a flavor explosion. Add Your Touch to Caprese Dip Feel free to swap in different cheeses like goat or feta for a unique twist. You can also add a pinch of red pepper flakes for heat or some sautéed mushrooms for an earthy flavor. Storing & Reheating Caprese Dip Store leftover dip in an airtight container in the fridge for up to three days. For reheating, simply warm it gently in the oven until the cheese is gooey but avoid overheating to maintain freshness. It was a sunny afternoon when I served this Caprese Dip at a friend’s gathering. I could still hear the laughter and compliments ringing in my ears, especially when one guest declared it “the best dip ever.” That joyous moment made all the chopping and roasting worthwhile. FAQs About Caprese Dip What is Caprese Dip? Caprese Dip is a delightful and creamy appetizer inspired by the classic
Easy Ricotta Dip with Hot Honey for a Perfect Appetizer
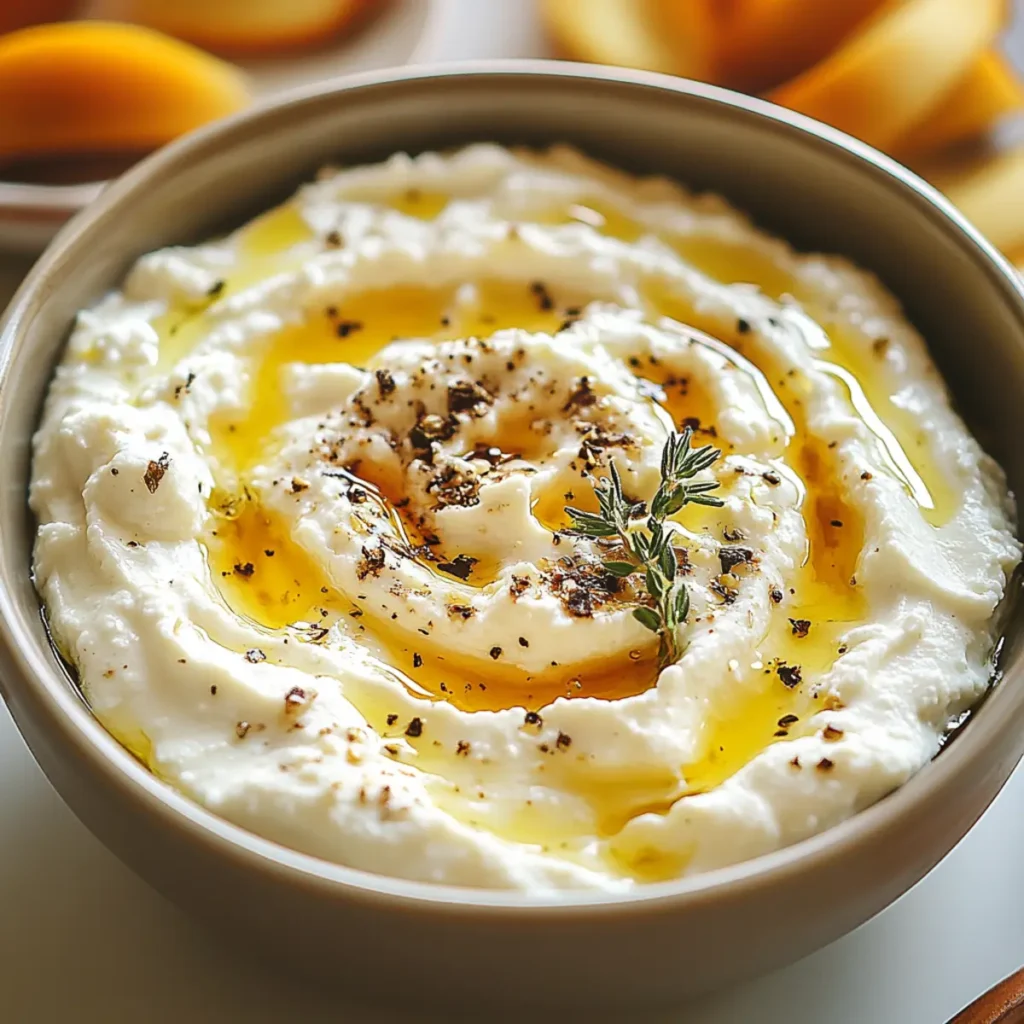
Imagine a dip that can turn an ordinary gathering into an extraordinary feast with just a few simple ingredients. This Ricotta Dip with Hot Honey does exactly that, wrapping your taste buds in creamy cheese while drizzling a touch of sweet heat on top. Each bite offers a delightful contrast of rich creaminess and spicy sweetness, creating a flavor explosion that will have your friends and family clamoring for more. Thinking about the perfect occasion for this dip? Picture a cozy night with friends, a celebratory get-together, or even a spontaneous snack after a long day. This dip is not just food; it’s a memory in the making. Just one taste transports you to a sunny Italian terrace, basking in good company and laughter. Get ready for a flavor experience that’s nothing short of magical, ensuring every gathering is filled with joy and deliciousness. Ingredients for Ricotta Dip with Hot Honey Here’s what you’ll need to make this delicious Ricotta Dip with Hot Honey: 1 cup fresh ricotta cheese – The creamy base of this dip; look for high-quality, fresh ricotta for the best flavor. 2 tbsp hot honey – Artisanal hot honey adds a kick and sweetness; feel free to balance the heat by adjusting the amount. 2 tbsp fresh basil or thyme – Finely chopped, these herbs heighten the freshness of the dip; fresh is best, but dried can work in a pinch. 1 tbsp lemon juice – Freshly squeezed for a burst of acidity that enhances the flavors; bottled lemon juice just won’t cut it here. Salt and pepper to taste – Essential for seasoning; adjust according to your preference for balance. How to Make Ricotta Dip with Hot Honey Follow these simple steps to prepare this delicious Ricotta Dip with Hot Honey: Step 1: Mix the Base In a medium bowl, combine the ricotta cheese and freshly squeezed lemon juice. Use a spatula or whisk to mix until smooth and creamy. This is like making a magical potion, but instead of magic, it’s all about creamy goodness! Step 2: Season to Perfection Add salt and pepper to taste. Don’t be shy; seasoning brings the flavors alive! Blend it all well, ensuring every bite is full of flavor. Step 3: Fold in the Freshness Gently fold in the finely chopped herbs, scattering them throughout the mixture. This step is where the aroma really starts to come alive, filling your kitchen with fragrant herb glory. Step 4: Transfer and Drizzle Transfer the mixture to a charming serving bowl. Now comes the fun part: drizzle that hot honey generously over the top. This is what elevates our dip from good to absolutely sensational! Step 5: Serve with a Side Serve immediately alongside an assortment of crunchy veggies, chips, or artisan bread. The beauty of this dip is that it pairs perfectly with countless dippers—whatever you have on hand! Step 6: Enjoy and Gather Sit back, relax, and watch as your friends and family devour this Ricotta Dip with Hot Honey. Revel in their delight and bask in the glory of your culinary creation! And there you have it—an easy, delightful Ricotta Dip with Hot Honey that’s sure to become your go-to recipe for any occasion. Its combination of creamy ricotta, fragrant herbs, and sweet yet spicy honey is an experience, not just a dip. Whether it’s a festive gathering or a casual Friday night, this dip will make you the star of the show—so grab your ingredients and get ready for a dip that’s sure to impress! Perfecting Ricotta Dip with Hot Honey Cooking Process To achieve the best results, start by blending ricotta cheese with lemon juice until smooth. Season, then fold in herbs. Finally, drizzle hot honey on top and serve with your favorite dippers. Add Your Touch to Ricotta Dip with Hot Honey Feel free to swap fresh herbs for dried ones if you need to, or add your favorite spices for an extra kick. A pinch of garlic powder or a dash of red pepper flakes can add depth to the flavors. Storing & Reheating Ricotta Dip with Hot Honey Store leftover Ricotta Dip in an airtight container in the refrigerator for up to three days. To reheat, simply let it sit at room temperature for a bit before serving, or warm it gently in the microwave. Sharing this dip at a family gathering turned out to be a huge hit; my uncle even asked for the recipe, claiming it was the best appetizer he’s ever tasted! FAQs About Ricotta Dip with Hot Honey What is Ricotta Dip with Hot Honey? Ricotta Dip with Hot Honey is a creamy, flavor-packed appetizer that’s perfect for sharing. Combining smooth ricotta cheese with a touch of lemon juice and fresh herbs, this dip offers a delightful contrast of savory and sweet. The addition of hot honey elevates the dish, delivering a gentle heat that perfectly complements the richness of the ricotta. Whether served with crunchy vegetables or chips, this dip is guaranteed to be a crowd-pleaser at any gathering. How to serve Ricotta Dip with Hot Honey? Serving Ricotta Dip with Hot Honey is as easy as it gets! Once prepared, transfer the dip to a beautiful serving bowl and drizzle generously with hot honey. Pair it with a variety of dippers for a colorful presentation. Crunchy vegetables like carrots, cucumbers, and bell peppers make great choices, while toasted bread or crispy chips add a satisfying crunch. This versatile dip can also be served alongside charcuterie boards, offering a unique flavor that pairs beautifully with meats and cheeses. Can I make Ricotta Dip with Hot Honey ahead of time? Absolutely! You can prepare Ricotta Dip with Hot Honey a day ahead of your gathering. Simply follow the recipe, store it in an airtight container in the refrigerator, and let it sit at room temperature for about 20 minutes before serving. This will allow the flavors to meld beautifully, making the dip even tastier. Just be sure to
Delicious Shrimp Ceviche Recipe with Fresh Ingredients and Avocado
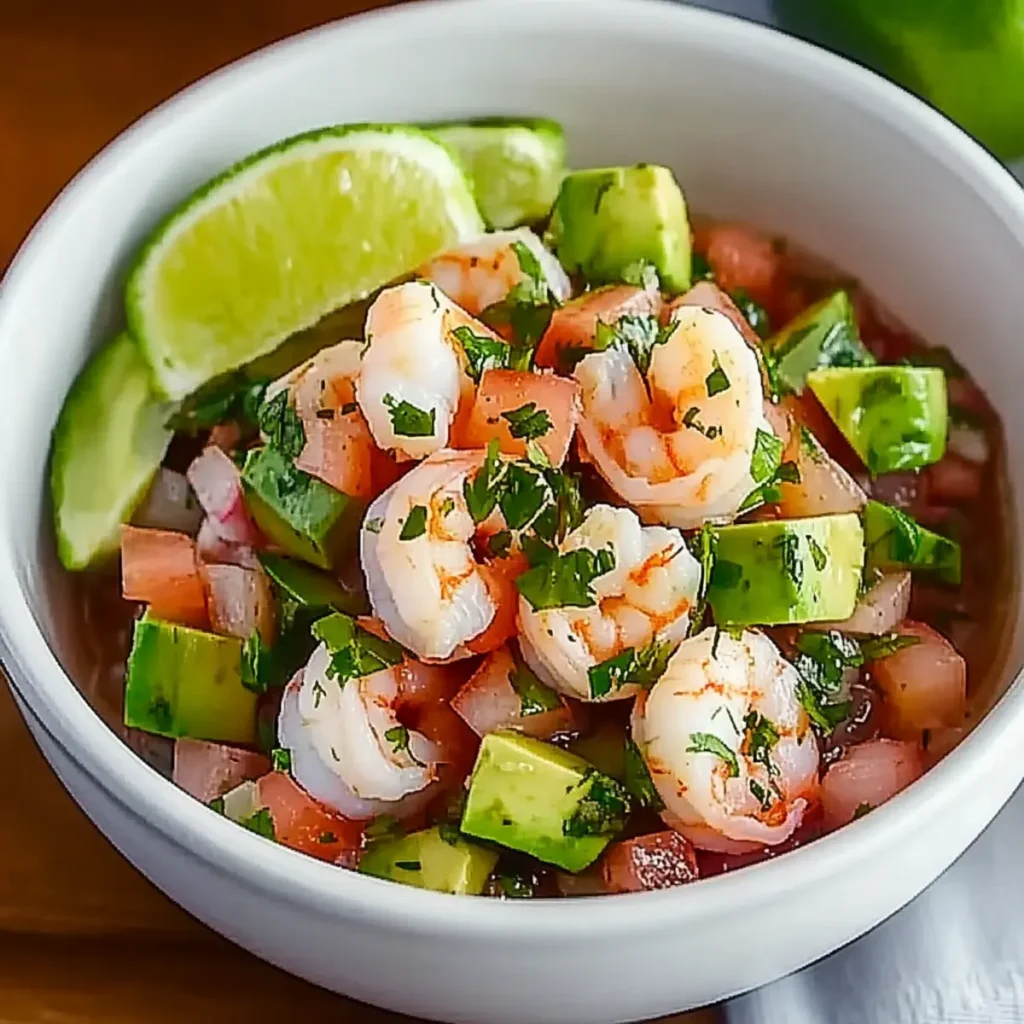
Shrimp ceviche is the kind of dish that makes your taste buds do the cha-cha, exploding with zesty flavors that transport you straight to a beachside taqueria. Imagine biting into perfectly succulent shrimp, marinated in the vibrant embrace of fresh lemon and lime juices, accompanied by the crunch of crisp veggies. That’s not just ceviche; that’s a full-on fiesta in your mouth! This delicious shrimp ceviche recipe with fresh ingredients and avocado will have friends asking for the secret ingredient, while you nod knowingly—it’s a sprinkle of love and a zest for life. As I reminisce about the sunny afternoons spent at the seaside, indulging in fresh ceviche while enjoying the soothing sounds of crashing waves, I can’t help but wish I could recreate those moments at home. Let’s dive into making this refreshing dish that’s perfect for a hot day, a casual gathering, or even a fancy dinner when you want to impress. You’ll discover how easy it is to whip up, and who knows—you may just earn the title of “Ceviche Connoisseur” among your friends and family. Ingredients for Delicious Shrimp Ceviche Recipe with Fresh Ingredients and Avocado Here’s what you’ll need to make this delicious Delicious Shrimp Ceviche Recipe with Fresh Ingredients and Avocado: 1 pound shrimp – Peeled and deveined; make sure to use fresh or thawed shrimp for the best texture. 1/4 cup lemon juice – Freshly squeezed from about two lemons; it brightens the flavors and adds acidity. 1/4 cup lime juice – Freshly squeezed from two to three limes; enhances the ceviche’s tangy profile. 2 medium tomatoes – Seeded and chopped; they add a sweet and juicy element to the mix. 1/2 small red onion – Finely chopped; provides a sharp contrast to the sweetness of the tomatoes. 1 medium jalapeño – Seeded and finely chopped; it brings a delightful kick without overwhelming the dish. 1/2 cup cilantro leaves – Chopped with tender stems included; they add freshness and herbal notes. 1/2 teaspoon kosher salt – Enhances all the flavors; adjust to taste! 1 medium avocado – Diced; adds creaminess and richness that balances the acidity. Tostadas or tortilla chips – For serving; they add a crunchy texture that pairs beautifully with the ceviche. How to Make Delicious Shrimp Ceviche Recipe with Fresh Ingredients and Avocado Follow these simple steps to prepare this delicious Delicious Shrimp Ceviche Recipe with Fresh Ingredients and Avocado: Step 1: Marinate the Shrimp In a large bowl, combine the shrimp with the lemon juice and lime juice. Let the shrimp soak in the citrus bath for about 3 minutes. This quick marination will give the shrimp a slightly opaque, pinkish color indicating they’re ready for the spotlight. Step 2: Mix in the Vegetables Add the chopped tomatoes, red onion, jalapeño, cilantro, and kosher salt to the marinated shrimp. Stir gently to combine, ensuring every shrimp is enveloped in that delightful mixture. The colors should start dancing together, and oh, the aromas! Step 3: Fold in the Avocado Dice the avocado into small cubes and carefully fold it into the ceviche mixture. This step is crucial as it introduces a creamy element that enhances the dish’s flavor profile without taking away from its refreshing essence. Step 4: Chill the Ceviche Cover the bowl with plastic wrap or a lid and place it in the refrigerator for at least 30 minutes. This allows the flavors to meld beautifully while the ceviche chills to perfection. You can also bask in the anticipation as the aromas waft through your kitchen. Step 5: Serve and Enjoy When you’re ready to serve, spoon the ceviche into bowls or onto tostadas or tortilla chips. This ceviche makes a marvelous appetizer or a light main dish, and trust me, the compliments will start rolling in. Don’t forget to garnish with extra cilantro or even a splash of hot sauce if you’re feeling adventurous! This delicious shrimp ceviche recipe with fresh ingredients and avocado is not just food; it’s a refreshing escape into the world of vibrant flavors and textures. Perfect for date nights, family gatherings, or simply treating yourself on a sunny afternoon, each bite is bound to remind you of carefree beach days. So fire up your zest for life, and get ready to enjoy a plate of sunshine right in your home! This showstopping Delicious Shrimp Ceviche Recipe with Fresh Ingredients and Avocado delivers restaurant-quality results using simple ingredients you probably already have at home. The perfect balance of textures and flavors creates an unforgettable dining experience that will have everyone asking for seconds. Picture-perfect presentation with vibrant colors makes this dish absolutely Instagram-worthy and guaranteed to impress any dinner guest. Incredibly versatile recipe that works beautifully for weeknight dinners, meal prep, special occasions, or even outdoor entertaining sessions. Perfecting Delicious Shrimp Ceviche Recipe with Fresh Ingredients and Avocado Cooking Process Start by marinating the shrimp in citrus juices to “cook” them. While they marinate, chop the vegetables and prepare your serving dishes. Combine everything together once the shrimp are opaque for the freshest results. Add Your Touch to Delicious Shrimp Ceviche Recipe with Fresh Ingredients and Avocado Feel free to switch up the proteins by using scallops or even diced fish. Add a sprinkle of mango for a sweet twist or some extra jalapeño if you love that spicy kick. The options are endless! Storing & Reheating Delicious Shrimp Ceviche Recipe with Fresh Ingredients and Avocado Store ceviche in an airtight container in the refrigerator for up to two days. Avoid reheating to preserve the fresh flavors; instead, enjoy it straight from the fridge for a revitalizing snack. Cooking ceviche brings back fond memories of sunny afternoons with friends, sharing laughs and stories over bowls of bright, zesty goodness that danced on our taste buds. FAQs About Delicious Shrimp Ceviche Recipe with Fresh Ingredients and Avocado What is Delicious Shrimp Ceviche Recipe with Fresh Ingredients and Avocado? The Delicious Shrimp Ceviche Recipe with Fresh Ingredients and Avocado is a refreshing dish that
Delicious Oven Roasted Broccoli Recipe Ready in Just 30 Minutes
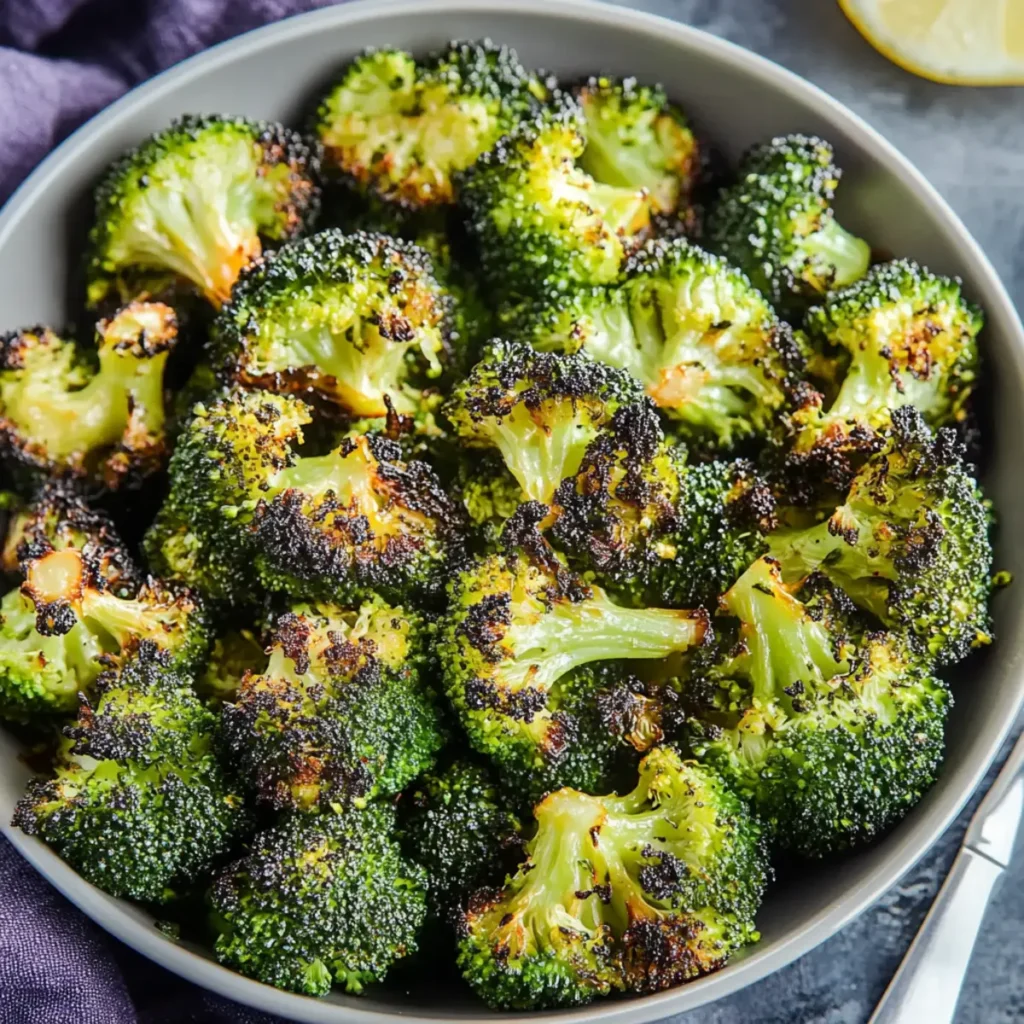
Imagine biting into a tender floret of broccoli that’s crisped to perfection, delighting your taste buds with its savory, earthy flavor. This delicious oven roasted broccoli recipe in just 30 minutes transforms these green beauties into a mouthwatering side dish that will make you want to say farewell to those soggy, boiled greens. Picture a vibrant green canvas, draped in a golden olive oil glaze, as the fragrant aromas waft through your kitchen, inviting everyone to gather around the table for a healthy feast. Now, let me take you on a little journey. Back in the day, when I was a curious newbie in the kitchen, I stumbled across an oven roasted broccoli recipe that changed my life. I had invited some friends over for dinner, and the fast food urge was looming like an unwanted guest. Instead, I discovered roasting—specifically roasting broccoli. As the broccoli baked, it transformed not just in taste but in appearance, turning from a sad, dull vegetable into a vibrant dish bursting with flavor. Now, every time I make this, it brings back the joy of that first successful culinary adventure. So, why not make this delicious oven roasted broccoli recipe in just 30 minutes the star of your next meal? Ingredients for Delicious Oven Roasted Broccoli Recipe in Just 30 Minutes Here’s what you’ll need to make this delicious Delicious Oven Roasted Broccoli Recipe in Just 30 Minutes: 2 lbs broccoli – Look for firm, bright green heads with tightly packed florets. If the stems are sturdy and unblemished, you’re golden. 2 Tbsp olive oil – A good-quality extra virgin olive oil will enhance the natural flavors of the broccoli while providing that perfect crispness. 1/4 tsp salt – Use coarse sea salt for better flavor distribution that accentuates the broccoli’s taste. Adjust to your liking, of course! 1/4 tsp pepper – Freshly cracked black pepper is best for that delightful kick that adds a subtle warmth to your dish. How to Make Delicious Oven Roasted Broccoli Recipe in Just 30 Minutes Follow these simple steps to prepare this delicious Delicious Oven Roasted Broccoli Recipe in Just 30 Minutes: Step 1: Preheat the Oven Preheat your oven to 425°F (220°C). This high temperature is key to achieving that lovely crispy texture we’re going for. Step 2: Prepare the Broccoli Rinse the broccoli under cold water and pat it dry. Trim the ends of the stems and cut the broccoli into bite-sized florets for uniform cooking. Step 3: Season the Broccoli In a large bowl, toss the broccoli florets with the olive oil, salt, and pepper. Ensure each piece is evenly coated. This is the moment to gently massage the oil into the florets, making them feel loved. Step 4: Spread on the Baking Sheet Spread the seasoned broccoli evenly on a baking sheet lined with parchment paper. Make sure to give them some breathing room—crowding the pan will turn your crispy dreams into soggy disappointment. Step 5: Roast the Broccoli Roast in the oven for 20 to 25 minutes, or until the broccoli is beautifully tender and has those gloriously crispy edges. Halfway through, toss the broccoli around for even cooking. Step 6: Serve and Enjoy Once done, remove from the oven and let it cool for a minute. Serve warm as a side dish or even toss it into a salad. This is when you can pat yourself on the back and say, “I’ve nailed it!” Now, imagine walking into your dining room, bringing in a sheet pan filled with this vibrant dish, and the smiles that light up the faces of your family and friends. This delicious oven roasted broccoli recipe in just 30 minutes is not just a side—it’s a conversation starter, a confidence booster, and a dish anyone will proudly serve at their table. So, fire up that oven, and let the good times roll with this easy-to-make, flavorful veggie masterpiece! This showstopping Delicious Oven Roasted Broccoli Recipe in Just 30 Minutes delivers restaurant-quality results using simple ingredients you probably already have at home. The perfect balance of textures and flavors creates an unforgettable dining experience that will have everyone asking for seconds. Picture-perfect presentation with vibrant colors makes this dish absolutely Instagram-worthy and guaranteed to impress any dinner guest. Incredibly versatile recipe that works beautifully for weeknight dinners, meal prep, special occasions, or even outdoor entertaining sessions. Perfecting Delicious Oven Roasted Broccoli Recipe in Just 30 Minutes Cooking Process To yield the best results, start by preheating the oven while you wash and chop the broccoli. Toss the florets in olive oil, salt, and pepper, then spread them on the baking sheet for roasting. Add Your Touch to Delicious Oven Roasted Broccoli Recipe in Just 30 Minutes Feel free to customize this recipe by adding garlic or lemon zest for extra flavor. You can also sprinkle grated Parmesan or red pepper flakes for a spicy kick, making it your own. Storing & Reheating Delicious Oven Roasted Broccoli Recipe in Just 30 Minutes Store leftover broccoli in an airtight container in the refrigerator for up to three days. Reheat in the oven at 350°F (175°C) until warmed through for the best texture. The first time I served this dish at a family gathering, my aunt couldn’t stop raving about how the broccoli was the star of the meal, which still makes me smile! FAQs About Delicious Oven Roasted Broccoli Recipe in Just 30 Minutes What is Delicious Oven Roasted Broccoli Recipe in Just 30 Minutes? The Delicious Oven Roasted Broccoli Recipe in Just 30 Minutes is a quick and simple way to elevate your veggie game. This dish features fresh broccoli florets tossed with olive oil, salt, and pepper, roasted to perfection. In just half an hour, you can transform an ordinary vegetable into a delightful side that everyone will enjoy. Perfect for any occasion, this recipe boasts a crispy texture and vibrant flavor profile, proving that eating your greens can be both easy and delicious. How do you